Showing posts with label baking. Show all posts

Tuesday, October 21, 2014

The Texan's Shortbread

First, just because it was beautiful and delicious:

All weddings should have towers of cupcakes, don't you think?


That's a champagne buttercream frosting with strawberries right there. 

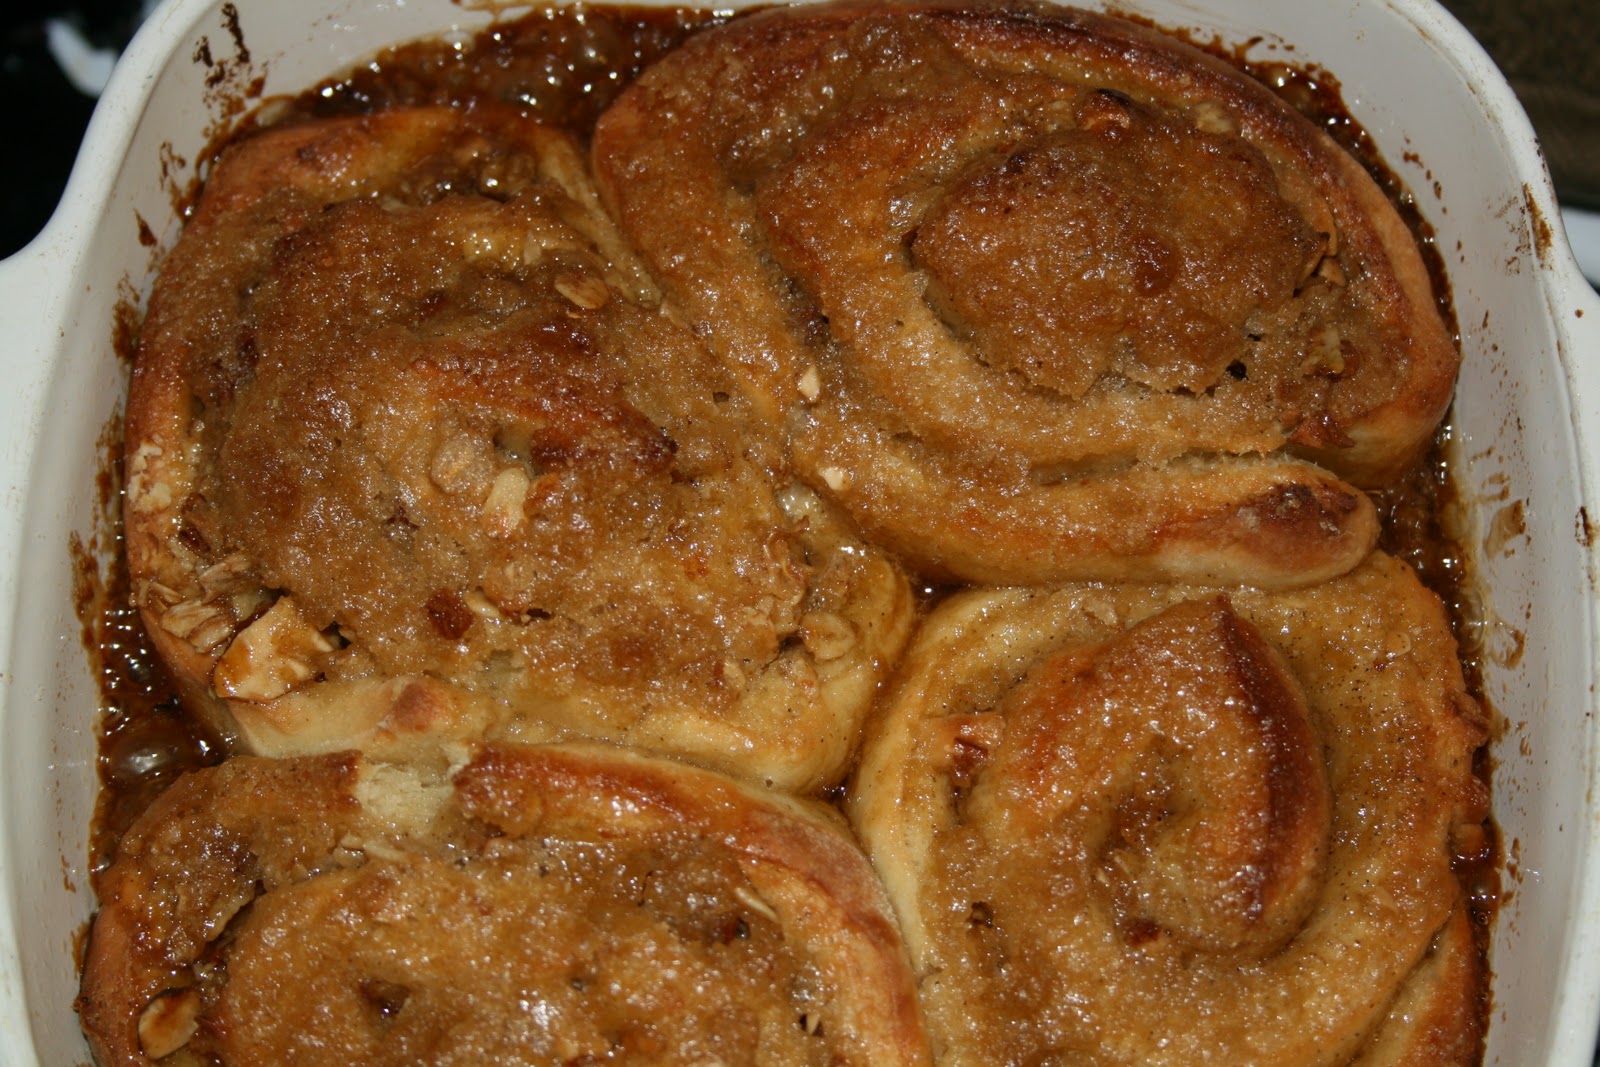
Our cutting cake was cinnamon-chocolate cake with spicy chocolate ganache and Kahlua buttercream. I KNOW.

One of my favorites is this one: Guinness-chocolate cupcakes with Bailey's buttercream. Fine, they're all my favorite.

Wedding photos by Sweet Poppy Studios.

Our wedding was so much fun! We decided to have a brunch reception, and just happened to pick a gorgeous June day for it. Many people pitched in to make it great, including three people who loaned us cake stands to hold our seven zillion cupcakes.


In the months after our wedding, our conversations about food have started to change. Sure, we got some cookbooks as gifts and have found several new favorite recipes, and we are usually eating meatless twice a week instead of just once, but there's been another kind of change, too. The Texan, who literally didn't know how to hold a knife properly and has been known to take 15 minutes to cut up an avocado, took a knife skills class. So now dinner prep goes like this:

Me: Could you please cut up that bell pepper?
Texan: Do you want that diced or julienned?

And weekends sound like this:

T: What do you want to do this weekend?
Me: I dunno. Swimming, maybe. What do you want to do?
T: I feel like making shortbread.

Just this weekend, I come home from an out-of-town conference, and the next day happens to be my birthday. I walk in the house and smell fresh-baked brownies, which later get served to me with a side of lemon sorbet.

Me: You made brownies? For me? Wow.
T: Yep. With pecans on top. How do you like the sorbet?
Me: It's good. Where'd you buy it?
T: I made it.
Me: Seriously?
T: I squeezed the lemons by hand. It took forever! Guess what else is in it? Here, I'll just tell you. I added some of that tea you like. Plus a splash of bourbon.

What in the actual fuck?

I decided to take him up on his yen for shortbread. A long-term substitute teacher at my school, who also happens to be a puppy raiser for Guide Dogs for the Blind, had come to the end of her assignment, and we wanted to throw her a mini party to say thanks for all her hard work. She has dog-themed everything: shirts, earrings, sweaters, socks, quilts, placemats, you name it. And she is raising her 19th puppy, who came to school each day, for Guide Dogs. So what better theme to use than Bone Voyage?

I didn't think of this theme on my own. I've been to one other Bone Voyage party, so I knew shortbread shaped to look like dog biscuit would be the perfect treat. There was a straightforward recipe on the back of the bag of flour, so the Texan jumped right in. My only contribution was blitzing some nuts for half the dough. The rest was all him.


Coworkers specifically stopped me and told me how much they liked the shortbread bones. Not just the cuteness, but the actual shortbread. It was really simple, but really good. Possibly even the best ever.

And I have to agree with them.

The Texan's Brown Sugar Shortbread
adapted from our bag of Natural Directions organic AP flour

1 C butter, softened
1/2 C brown sugar
1/4 tsp vanilla extract
1/4 tsp salt
2 C AP flour
1/3 C finely chopped nuts, such as pecans or almonds (optional)

1. Preheat oven to 325 degrees.
2. Cream butter, brown sugar, and vanilla extract until fluffy. 
3. Add salt, flour, and nuts if using, and mix well.
4. On a lightly floured surface, roll dough into 1/2" thick rectangle.
5. Cut into shapes with cookie cutter, or cut into rectangles 
   1.5" x 2.5"
6. Place cookies onto baking sheets lined with parchment or silicone mats. Prick with fork.
7. Bake for 20-25 minutes, or until light golden brown. Cool completely on wire rack.


Saturday, August 25, 2012

The Cupcake Craze, Part 1


Frosting isn't easy, you know.

Sometimes it's too thin and runs down the sides of the cupcake, leaving bald spots on the top.

Sometimes it's too sweet because the powdered sugar you used to thicken it is enough to choke a horse.

Sometimes it's grainy, or clumpy, or both, or is made with things like Crisco and really isn't food.

But this frosting is perfect. It's smooth, provided you coax it to the correct temperature, and perfectly sweet and chocolatey and has just five ingredients:

1. cream
2. powdered sugar
3. chocolate
4. butter
5. vanilla extract

For once, my cupcakes look like the ones in the picture in the cookbook. That never happens.

Of course, frosting is nothing without a good cupcake to rest upon. These vanilla cupcakes are also perfect, and versatile: they could support lemony frosting, or cream cheese, or vanilla, or mocha, or whatever else your little heart desires.

I've been resistant to all things cupcake because, well, everyone's doing it.  I hate doing what everyone else is doing. Plus, cupcakes really do need frosting. Otherwise they are just muffins that seem to be missing something. And I believe I have made my position on frosting quite clear. But I have to admit that the last two cupcake batches I've made have been awesome enough to make me a believer.

A believer in cupcakes.

If the frosting is too cold, it doesn't spread or shine as nicely.


Vanilla Cupcakes with Truffle Cream Frosting
adapted from Chocolate Obsession by Michael Recchiuti

makes 12 cupcakes

For the cupcakes:
1 1/2 C AP flour
1 tsp baking powder
1/2 tsp baking soda
1/4 tsp salt (kosher is best)
1 C (8 oz) creme fraiche, at room temperature (I substituted full-fat plain yogurt; DO NOT use low-fat or nonfat!)
2 eggs, at room temperature
1 tsp vanilla extract (I also added seeds from 1/2 vanilla bean)
6 TBSP unsalted butter, at room temperature
3/4 C granulated sugar

For the frosting:
8 oz chocolate (65% dark)
2/3 C heavy whipping cream
2/3 C plus 2 TBSP confectioner's sugar
4 TBSP unsalted butter, at room temperature
1 TBSP vanilla extract

1. Preheat oven to 325 degrees. Line 12 standard muffin cups with paper liners, or coat with cooking spray. Set aside.
2. Sift flour, baking powder and soda, and salt together into a medium bowl. Set aside.
3. Combine creme fraiche or yogurt, eggs, and vanilla extract and seeds (if using) in a medium bowl and whisk by hand until well-mixed.
4. Beat butter on medium speed until butter is creamy. Add granulated sugar and beat until fluffy and pale.
5. On low speed, add the dry ingredients in 3 additions, alternating with the wet ingredients in 2 additions.
6. Divide batter among muffin cups, filling each about two-thirds full. Bake for 15-20 minutes, or until the cupcakes are puffed, slightly browned, slightly cracked on top, and a toothpick inserted in the center comes out clean. Let cool completely in the pan on a wire rack. Remove from muffin pan.
7. Place chocolate in a medium bowl. Put cream and confectioner's sugar in a small saucepan over medium heat and bring to a simmer. Cook for one minute at a simmer and remove from heat.
8. Pour hot cream mixture over chocolate and whisk by hand until chocolate melts. Whisk in butter, and then vanilla extract.
9. Cover bowl with plastic wrap so that the wrap touches the surface of the frosting, and refrigerate until mixture reaches 70 degrees. This will probably take 30-40 minutes, but start checking after 20.
10. When frosting is at 70 degrees, beat on high speed until it is lighter in color and less dense.
11. Frost cupcakes as desired.


Tuesday, July 10, 2012

Olive Oyl

My Italian ancestors would be mortified, I'm sure, to know that lately I've kept canola oil in my pantry instead of olive oil. Seriously, I haven't even owned a bottle of olive oil in over a year.

While canola oil is the better choice for baking, which is why I chose it, it doesn't give much flavor to salad dressings or anything that is sauteed. I figured this could be compensated for to a certain degree with seasonings, whereas the density that olive oil gives my baked goods can't. A brick, after all, is still a brick no matter how much sugar I add.

Enter the June 2012 issue of Vegetarian Times where, amidst a series of baking recipes calling specifically for olive oil, there just happened to be a cake recipe with berries, citrus, wine, and olive oil. I screamed silently at the editors of the magazine, "Gawwwwd, twist my arm, why don't you!" Then I ran to the store to buy a bottle.


Despite such terrible pain in my arm, I managed to come up with this:


I take back everything I ever said about baking with olive oil. This cake was light and fluffy, almost sponge-y but in a good way, and the flavor was not overly sweet or olive-y. The citrus zests and wine lent bits of flavor that were perfectly balanced, yet there was plenty of room for a berry compote or maybe a sorbet to accompany the cake.

The editors note that the "recipe calls for a sweet wine to flavor the cake, but you could also use white wine left over from last night's dinner." While several of my regular readers don't ever wonder what to do with last night's wine because there is never any wine left over, those who do might find their own arms twisted just enough to... well, you know.

Figs were tasty, but I suggest a juicier berry to serve with the cake.

Olive Oil-Wine Cake
from Vegetarian Times, June 2012

Serves 10

2/3 C olive oil
1 1/2 C AP flour
1 tsp baking powder
1/4 tsp salt
1/3 C sweet dessert wine, such as Moscato, Marsala, or Muscat
1/3 C orange juice
1 tsp grated orange zest
1 tsp grated lemon zest
4 eggs
1 C sugar
2 TBSP confectioners' sugar
1-2 pints fresh berries

1. Preheat oven to 350 degrees. Coat a 9" springform pan with cooking spray or olive oil. Line bottom of pan with a circle of parchment paper, cut to fit.
2. Whisk together flour, baking powder, and salt in a bowl. In a separate bowl, whisk together olive oil, wine, orange juice, and zests.
3. Beat eggs and sugar in stand mixer or with electric mixer for 4 minutes, or until pale yellow and tripled in volume. Add half of dry ingredients, and mix on low speed until blended. Add half of liquid mixture, and mix to blend. Repeat with remaining dry and liquid mixtures.
4. Pour batter into prepared pan, and set on baking sheet. Bake 50 minutes, or until toothpick inserted in center comes out clean. Cool 10 minutes, and then remove sides of pan to cool completely. Dust with confectioners' sugar and serve with berries (or compote).


Monday, March 19, 2012

Jalapeños Make Everything Better

I've noticed a pattern in several recent conversations.

Me: "I want to create a new kind of candy for my Etsy shop. I'm thinking about--"
The Texan, interrupting: "What about chocolate-covered jalapeños?"

or,

Me: "What do you think about flavored caramels? You know, like espresso or chocolate."
T:  "I'm thinking jalapeño-flavored caramels."

and then,

Me: "Would you please make a loaf of bread to have with dinner tonight?"
T: "Jalapeño bread all the way, baby!"

Knock yourself out.

But then we decided to make chili, and because we both love cornbread, we knew that Coyote Joe's Jalapeño Bacon Cornbread recipe was the flavor direction we wanted to head in. However, the two cups of buttermilk, two eggs, cup of cheddar, one-third cup of butter, and half-pound of bacon in the recipe wasn't the direction our arteries wanted to head in, so we used the recipe on the back of the box of cornmeal and added a single slice of applewood-smoked bacon and a jalapeño.

It was ridiculous. As in, really good. And perfect with a bowl of chili.


But then, as we made our second batch of cornbread to eat with the leftover chili, I noticed our conversations were heading in a new direction.

The Texan, wide-eyed: "Let's add the entire half-pound of bacon that Coyote Joe's recipe calls for!"
Me: "Let's not."
T: "Why?"
Me: "Because Coyote Joe had gastric bypass surgery in 2006."

Chocolate-covered jalapeños are starting to sound pretty good right now.

Jalapeño-Bacon Cornbread
adapted from On the Chile Trail and Albers
makes 12 servings

1 C yellow corn meal
1 C all-purpose flour
1/4 C granulated sugar
1 TBSP baking powder
1 tsp salt
1 C milk (I used 1/4 C milk + 3/4 C soy milk)
1/3 C vegetable oil
1 egg, lightly beaten
1-2 slices cooked bacon, crumbled
1-2 jalapeños, diced and seeded

1. Preheat oven to 400 degrees. Coat an 8" x 8" pan with cooking spray. 
2. Combine corn meal, flour, sugar, baking powder, and salt in a medium bowl. 
3. Combine milk, oil, and egg in small bowl. Mix well. 
4. Add milk mixture to flour mixture. Stir until just incorporated.
5. Add bacon and jalapeño. Stir until just combined. Do not overmix! Pour into prepared pan.
6. Bake for 20-25 minutes, or until toothpick inserted in center comes out clean.
Note: This recipe can also be used to make muffins. Fill cups 2/3 full and bake for 15 minutes, using same test for doneness as above.

Monday, February 27, 2012

Bananas, Coffee, and Chocolate


While I am fond of all three ingredients in the title of this post, I was not entirely sure they'd go together well in a muffin. But The Cheese Board: Collective Works cookbook says it's a great combination and that many patrons love these muffins, so I figured scores of Berkeleyans couldn't be wrong.

These are not healthy muffins by ANY stretch of the imagination, but could be modified to be somewhat less bad. The cup of sour cream added a really nice tang to the batter, which was still present after the muffins baked (I was afraid it would dissipate). Plain low-fat yogurt could be substituted, though, and still impart the same basic tang. An entire cup of chocolate chips just isn't necessary; I used a half cup and thought it was more than enough. I also reduced the sugar in the recipe by a tablespoon or two, which turned out just fine.

I was a bit disappointed that the coffee flavor seemed to get lost in the muffins, what with all the banana, sour cream, and chocolate, so it might be worth adding some espresso granules or instant espresso powder to the batter to increase the mocha flavor.


The recipe actually says to fill the muffin cups all the way to the top. When does THAT happen?!


I froze most of the baked muffins, since I can't possibly eat 12 of them in a few days, and have found that when I slice them in half and reheat them in the oven for several minutes, they hold up pretty well. Maybe that's because the stick of butter contains enough fat to prevent them from drying out. Like 47 times over.

The perfect muffins for letting a little kitty cat warm himself on a cold winter morning.

Banana Mocha Chocolate Chip Muffins
from The Cheese Board: Collective Works

makes 12 muffins

1 egg
1 egg yolk
2 ripe bananas, mashed
1/2 tsp vanilla extract
1/2 C strong brewed coffee, cooled
1 C sour cream or plain yogurt
2 1/4 C AP flour
1/4 tsp baking soda
2 tsp baking powder
1/4 tsp salt
3/4 C sugar
1/2 C (1 stick) cold unsalted butter, cut into 1-inch cubes
1/2 - 1 C chocolate chips

1. Preheat oven to 375 degrees. Coat muffin pan with cooking spray and set aside.
2. In a medium bowl, combine egg, egg yolk, bananas, vanilla, coffee, and sour cream or yogurt. Whisk until blended.  Set aside.
3. Sift flour, baking soda, and baking powder together in bowl of stand mixer. Add salt and sugar to dry ingredients. 
4. Add butter and cut in on low speed for about 4 minutes, or until it is the size of small peas. Mix in chocolate chips. Make a well in the center and pour in wet ingredients. Gently mix just until combined. Do not overmix!
5. Scoop batter into prepared muffin pan, filling each well until batter just peeks over top of well. Bake for 25-30 minutes, or until muffins are golden brown, firm, and springy.
6. Let cool in pan for 10 minutes, then unmold and cool completely on a wire rack.

Wednesday, December 14, 2011

Fifteen Days


It took me 15 days to make this bread.

Sort of.

It took me 15 days to make the sourdough starter that became this bread. 15 days of feedings, of worrying that it might not survive, of wondering what kind of character it would develop. That's right. It became my child for two weeks.


Clearly I'd make a horrible mother, since I forgot to feed it on schedule once or thrice.  This is why I haven't reproduced. Anyway. My child turned out just fine, of course, getting stronger and less smelly over time. Its first two loaves were not great, tasting a lot like something that was baked in a Fisher-Price oven, but then came the third loaf. Pretty near perfect, and I'm not just saying that because I'm its mother.

In Breads from the La Brea Bakery, Nancy Silverton makes a simple statement that makes everything about bread baking infinitely more complicated: Bread is alive.  The starter used to make it is born of wild yeasts and beneficial bacteria in the air. The starter has a metabolism, which is maintained through portion control and eating regular meals.  It is temperamental and likes the room to be at a balmy 75 degrees. And it can be ornery-- it will be ready to bake when it is ready to bake, and not before.

It reminds me of someone I know.

I can't think of who it--

Oh right. Me.


The answer to your question is, "Because it tastes better." Commercial (i.e. active dry yeast that you buy at the grocery store) yeast makes the dough rise too quickly, like it's taking growth hormones or something.  The flavor and character that are found in good loaves of sourdough bread come from the yeasts in the starter, and from the slow rise that happens as the starter is chomping on the starch in the flour. Silverton even says that starter created in New York, for example, won't have the same flavor as starter created here in the Bay Area, because the yeast varieties are different in the two regions.

It's like East Coast vs. West Coast rap, only with yeast.

I passed a bakery in Chicago once that offered baking classes. I stopped in to talk to the owner, who was a large, pasty, sweaty hulk of a man with a thick Eastern European accent. He was (a little too) excited to show me his starter, which was also large, pasty, and sweaty-looking, and I really didn't understand its purpose or his enthusiasm for this stinky glob. He said he drank some of the liquid daily for health, to which I silently replied that it clearly wasn't working.

I didn't take the classes from him.

But I do understand now why he was so excited about his starter, and why his having kept it alive for years is really quite impressive.  I so should have taken his classes.

Raising and maintaining a starter is fairly easy, now that I've got the hang of it. I have a container of base starter that lies dormant in the refrigerator until I need it. I now use a sticky note on the lid of the container to keep track of feedings, and I start with a smaller quantity each time I want to bake, since

1 cup starter + [(1 cup water + 1 cup flour) x 3 times per day x 3 days] = enough starter to fill a swimming pool


As with all living things, though, the starter must go through the cycle of life.  It is cute and bubbly as a child, then toughens a bit as it rises, and later takes on a distinct shape and size as it prepares for the oven. But as it bakes, the starter dies-- it is 450 degrees in there, after all-- and leaves behind its legacy in the form of a loaf with a crusty exterior, a chewy and irregular interior, and a note of pleasant sour.

Fortunately, its starter relatives are still alive in the fridge, and so it begins again.


Monday, November 28, 2011

Sugar, Sugar

Version 1, with syrup on bottom.
Because I didn't stuff myself quite silly enough over Thanksgiving weekend, I made these as soon as all the pumpkin pie was gone.


When I was a teenager, my mother subscribed to Center for Science in the Public Interest's monthly magazine, which ran exposés on all the artery-clogging restaurant foods in existence. One of which were Cinnabons, which in my opinion are the best non-food food at the mall. Not that I ever eat them. Or go to malls. That's just what I've heard.

One of the obscure flours I mentioned in an earlier post that has been waiting to be used is oat flour. I found a recipe for Double Oat Morning Buns, which I hoped would be like cinnamon rolls. Or snails. Or Cinnabons. Except with cardamom. And because I found the recipe on the Bob's Red Mill website, I figured it'd be relatively healthy, if not downright dull.

I figured wrong.

I realized my wrongness as I started Step 1, which is to combine just three ingredients for the sticky mixture that gets caramelized all over the place. The ingredients were sugar, maple syrup, and butter.  Delicious, for sure. But not even a little bit healthy.

Then in Step 2 I figured I'd even out the butter-sugar chaos with some fiber-licious oat flour. I did, but I also had to add more butter, more sugar, some eggs, and a cup of milk.  Which has calcium and protein and whatnot, but still.

Step 4 brought-- yes, that's right-- more sugar. Oh, and a tiny bit of rolled oats to up the fiber count. And cardamom. I love cardamom. If you don't, you can substitute cinnamon, with maybe a little allspice or cloves.

I started this recipe last night, because I knew the dough needed to be refrigerated for a bit, and I thought popping these in the oven first thing in the morning would be just like a Folger's commercial, only with baked goods. There is a non-refrigeration option, so I put the odds and ends of the dough in the oven last night with a little of the sugar-syrup mix on the bottom of the pan, as directed. But the buns I got were dry on top, and could have used more butter after baking. Furthermore, the sugary mix on the bottom got all overcooked and one corner of it almost burned. No good.

This morning, I decided to put the sugar mix on top of the buns and bake, letting it all run down the sides. You know, like at Cinnabon, but without the cream cheese icing. This did the trick-- soft, almost spongy dough, texture from the almond-oat-cardamom filling, and sweetness from the syrupy mess on top. All this amounts to the perfect way to start the day: in cardiac arrest. Just like at Cinnabon.

Version 2, with syrup running down the sides


Double Oat Morning Buns
adapted from www.bobsredmill.com
makes 18 buns-- cut recipe in half if you can't use that many

For the sugar mixture:
1/2 C maple syrup
1/3 C packed brown sugar
1/4 C butter

For the dough:
1 TBSP active dry yeast
1 C oat flour
3 to 3 1/2 C AP flour
1 C milk
1/4 C granulated sugar
1/4 C butter
1 tsp salt
2 eggs
2 TBSP butter, melted

For the filling:
1/3 C almonds, toasted and chopped
1/4 C packed brown sugar (you can probably use about half this much and get good results)
1/4 C rolled oats, toasted (you could double this amount for more texture)
1/4 tsp cardamom (I used 3/4 tsp)
1 TBSP butter, melted

I've changed the order of the steps, because the sugar mixture doesn't need to be made until just before these go in the oven. However, it can be made ahead and kept at room temperature until needed. 
1. Combine 2 cups of AP flour and yeast in the bowl of a stand mixer.
2. Combine milk, granulated sugar, 1/4 C butter, and salt in a saucepan over low heat until just warm and butter is melted (115-120 degrees F).  Add to flour mixture, and stir to combine. Add eggs. Beat at low speed for 30 seconds, and then scrape down sides of bowl. Beat 3 minutes at medium-high speed. Using a spoon, stir in the oat flour and as much of the remaining AP flour as you can. Turn dough out onto lightly floured work surface.
3. Knead in enough of the remaining AP flour to make a moderately stiff dough that is smooth and elastic (6-8 minutes, total). Place in a lightly greased bowl, turning once to coat. Cover and let rise in a warm place until doubled in size (1 to 1 1/4 hours).
4. Combine filling ingredients EXCEPT butter in a small bowl. Coat a 13" x 9" x 2" baking pan with cooking spray.
4. Punch down dough and divide in half. Cover dough and let it rest for 10 minutes. On lightly floured work surface, roll one half of dough into 9" x 6" rectangle. Brush top with melted butter.  Sprinkle half of filling mixture over melted butter on dough. Roll up jelly-roll style. Cut into 1-inch rounds and place cut side down in prepared pan. Repeat with remaining half.
5. Cover with plastic wrap and refrigerate at least 2 hours, or overnight.
6. Preheat oven to 375 degrees F. Remove buns from refrigerator and let stand at room temperature for 20 minutes. If any surface bubbles have formed, puncture with greased toothpick. Combine mixture ingredients in a saucepan, and stir over low heat until butter is melted and sugar is dissolved. DO NOT BOIL. Coat tops of buns evenly with mixture. Bake for 20-25 minutes. Cool slightly before serving.

Tuesday, November 1, 2011

#Occu-Pie


 "Occupy! Occupy! What kind of pie? Occupy!" 

 This catchy little chant has been stuck in my head for days. A man at a non-Occupy protest I attended last week kept shouting it during lulls in the action. As I listened, I was food-inspired. Though I wondered, What's in Occu-pie, anyway? 

Apples, of course. Apple pie is quintessentially American. So is the right to assemble, peacefully, and voice one's discontent with the status quo. I used three kinds of apples: Jonathan, Braeburn, and Granny Smith. Sort of like the apple version of a melting pot. 

But regular old apple pie wasn't enough to qualify as Occu-pie. It needed something more. Something slightly out of the ordinary, but not all hippie-like and beyond the mainstream. Maybe something with a little kick to it. 

Bourbon. For liquid courage (symbolic, of course, since the alcohol burns off) in the face of police throwing flash-bang grenades and tear gas, and maybe a little warmth on cold nights in tents. Having a non-existent hard liquor cabinet myself, I borrowed a few tablespoons from my neighbor. Who then borrowed some white wine I'd just opened for a recipe she was making. This sort-of-barter system suits us just fine, helping us ensure we use up what we have, saving us a few fossil-fuel-powered trips to the store, and creating a little mini-community of food and ideas that is the antidote to the Every Man for Himself attitude that fuels the Occupation.

Even though I made 25% more crust dough than I did for my Bolinas Blackberry Pie, I still didn't have enough to make a full lattice. So I threw flour, unmeasured, and butter at the wrong temperature into the food processor to make more. I chilled the dough, which I realized later was missing sugar, for one-fourth of the time I should have, and got a very pretty lattice that tasted like Play-Doh. This hasty fix for my pie was a gentle reminder that, like dough, change happens slowly.


While statements from protesters such as, "I have a Master's degree and I can't find a job" or "Big Banks foreclosed on my home" allow individuals to connect to the larger movement, #Occupy Wall Street isn't about getting those people's houses or jobs back. At least, not directly. It's really about changing a system that is totally out of balance, and is totally unsustainable. This MoveOn video, featuring Elizabeth Warren, sums it up nicely.    


Friday, October 21, 2011

Cyber-friendship Cookies

Recently, I joined foodbuzz.com, which is a bit like Facebook for food bloggers. The difference, though, is that I don't actually know any of my "friends"-- I didn't go to kindergarten with them, I didn't secretly have a crush on any of them in high school, and I don't cut their paychecks, so they are not obligated to befriend me. Yet nearly 50 total strangers welcomed me to the Foodbuzz world within 2 or 3 days, and have left little bundles of encouragement all over.


I've been in a female-dominated profession for the last decade. While I have met and befriended some fantastic and supportive women, I have also witnessed some catty behavior-- you know, that whole lobsters-in-a-tank mentality-- and so I appreciate the genuine interest, feedback, and willingness to share that has come my way in a genre of blogging that also seems to be dominated by women.

Feeling all warm and fuzzy inside (a not-so-common occurrence for me; just ask my face-to-face friends), I googled "friendship cookies," thinking I'd heard of such a thing, and thinking they seemed the perfect cookies to make now. My search results, though, were ambiguous at best, and it seems that any cookie can be a friendship cookie, so long as it is baked for a friend. Or 50.

I knew Dorie Greenspan wouldn't let me down, especially at a moment like this. I needed something that was relatively easy, not sickeningly sweet, and pretty**, since ugly friendship cookies just don't send the right message.  Oh, and I needed to use the 4 ounces of cream cheese I had on hand. Greenspan suggested rugelach. OK, not really, but the photo looked delicious and the dough calls for cream cheese, so it's sort of the same thing.

** I reread the recipe as I was writing this and realized I missed the step that told me to refrigerate the cookies for 30 minutes before baking. This probably explains why mine look like pigs in blankets. However, if you actually follow directions, you will probably get more shapely rugelach.

As with many of her cookie recipes, Greenspan says you can halve the dough and freeze it for those I Just Made A New Friend moments. I kept the second half of the dough in the fridge for a few days simply because I didn't have time to make all of them at once. Either way, they work well. I gave a few away to a live friend, who reported that they were so good that she was still thinking about them the following morning. I guess that means we'll be friends for a while.

Greenspan also notes that rugelach invite experimentation, and I agree. This recipe calls for jam, nuts, currants, chocolate, and cinnamon sugar in the filling. I used almonds, raisins, dark chocolate, and raspberry-apricot jam. I omitted the cinnamon sugar in the second half, because while the first ones were very good, they were on the verge of being too sweet. I doubt the original rugelach, made by Ashkenazi Jews, contained dark chocolate or jam, but if your new friends like chocolate, use it, by all means.


Foodie Friends Rugelach
from Baking: From my home to yours by Dorie Greenspan
*Greenspan says this recipe makes 32 cookies. I got about 24, but if you chop your ingredients finely and cut your triangles smaller, you can eek out 32.

For the dough
4 oz cream cheese, cold
1 stick (8 TBSP) cold, unsalted butter
1 C all-purpose flour
1/4 tsp salt

For the filling
2/3 C raspberry or apricot jam, heated over low heat until liquified
2 TBSP granulated sugar (I omitted this)
1/2 tsp ground cinnamon
1/4 C chopped nuts
1/4 chopped raisins (or currants)
4 oz dark chocolate, finely chopped (I used about 2 oz)

For the glaze
1 egg
1 tsp cold water
1-2 TBSP sugar


1. Let cream cheese and butter rest on counter for 10 minutes, so they are slightly softened but still cool. Cut into chunks.
2. Put cream cheese, butter, flour, and salt in food processor. Pulse machine 6-10 times, and then process until the dough forms large curds but does NOT form a ball on the blade.
3. Turn dough out onto work surface, form into a ball, and divide in half. Shape halves into disks and wrap each in plastic wrap. Refrigerate dough for at least two hours, or freeze for up to 2 months.
4. Working with one disk at a time, roll the dough out on a lightly floured surface into an 11-12" circle. Brush a thin layer of jam over dough, and sprinkle with half the cinnamon sugar, if using. Scatter half the nuts, raisins, and chocolate over the jam. 
5. Cut the circle into 16 wedges (cut into fourths first, then cut each fourth into fourths again).  Starting at the base of each wedge, roll up the dough into little crescents. Place on baking sheet coated with cooking spray or parchment paper, pointed end down. Refrigerate cookies for 30 minutes before baking. You can also freeze unbaked cookies at this point for up to 2 months. Don't defrost before baking. Just add a couple of minutes to your baking time.
6. Preheat oven to 350 degrees. 
7. Stir together water and egg. Brush a bit of the egg wash over the tops of the cookies and sprinkle a bit of sugar on top. Bake for 20-25 minutes until they are puffed and golden. Cool on wire racks.

Saturday, October 8, 2011

Pumpkin Spice Muffins

 There's no  pumpkin in these muffins.

I bought an enormous butternut squash for another recipe, and quickly realized I had way too much. I considered making a pie, since it is officially time for the orange flesh + cinnamon + cloves + nutmeg combination. But pies are big. I wanted something smaller. And butternut squash could easily stand in for pumpkin in these fabulous little muffins.

Since I had already baked the squash, I threw the unused portion into the food processor to purée it. This makes better-than-canned pumpkin. Or baby food. Whatever. The purée was sweeter than canned pumpkin, so I reduced the sugar in the recipe by about an eighth of a cup. I also used hazelnuts instead of pecans or walnuts, because that's what I had. I toasted them in the oven before I added them to the batter, because that's how I like them.

The recipe calls for unsalted raw sunflower seeds to be sprinkled on top of the muffins just before baking. Clearly, this would make them all earthy-crunchy-granola. These are listed in the "Breakfast Sweets" section of Dorie Greenspan's Baking, and while breakfast + sweets = oxymoron, there's no point trying to healthify things now. Face it, Greenspan: a few sunflower seeds will not neutralize an entire stick of butter for breakfast.

Muffins are best eaten the day they are made.  This disclaimer appears next to each muffin recipe in Baking, and in the directions of many other muffin recipes I've encountered. It's true, of course, but here's my alternate interpretation:  Find something moist and delicious to spread on the muffins on Days 2 and 3.  Butter is not an option, since cold butter spread on room temperature muffins creates Crumbs. Something spreadable would be perfect. Like cream cheese.

Starbucks has these pumpkin-cream cheese muffins with the glob of cream cheese built into the center of the muffin before baking. Mine were already baked, but I thought a little cream cheese icing would be perfect. Maybe with a little lemon juice to create a tart-sweet effect. I beat together some cream cheese, a few tablespoons of butter, a little powdered sugar, and some lemon juice and got the perfect spread. But my spreading attempts were not pretty. 


I remembered I had some piping tools in a drawer that I never use, so I gave the vintage one of my mother's a try. I wasn't sure about putting anything with acid in a metal container, but since the Icing Debacle lasted only a few minutes, I did it anyway. So far, I haven't died. And my icing is not Metal Flavored. 

My decorating skills, however, leave a lot to be desired. This is probably why the tools have stayed untouched in that drawer for ages. Yeah, I know-- chicken or egg. Anyway. The fancy star attachment did not magically create starry designs on my muffins. I thought it might be because my muffins have pointy tops, so I tried cutting off a muffin top and putting the icing on the now-flat surface. But, as everyone who watches Seinfeld knows, the muffin tops are the best part. So I put it back on. Somehow, I don't think that's what Elaine meant.


Many thanks to Kahori of Chuzai Living for telling me about Picasa and its nifty collage feature. Plus, I went to see the Picasso exhibit at the de Young museum last weekend. That guy had some issues. But he also had that whole collage thing down pat.


Pumpkin Spice Muffins
adapted from Baking: From my home to yours by Dorie Greenspan
makes 12 muffins

2 C all-purpose flour
2 tsp baking powder
1/4 tsp baking soda
1/4 tsp salt
3/4 tsp ground cinnamon
1/2 tsp ground ginger
1/8 tsp grated nutmeg (I used just a pinch)
a pinch of ground allspice (I used 1/4 tsp)
1 stick (8 TBSP) butter, at room temperature
1/2 C granulated sugar
1/4 C packed brown sugar 
2 eggs
1/2 tsp vanilla extract
3/4 C canned unsweetened pumpkin 
1/4 C buttermilk (I used 2% milk with about a teaspoon of lemon juice mixed in; let stand for 10 mins) 
1/2 C raisins
1/2 C chopped pecans, walnuts, or hazelnuts (try them toasted first!) 

1. Preheat oven to 400 degrees. Spray 12-cup muffin pan with cooking spray. If you use paper cups, spray the insides so they release the muffins instead of tearing off half your muffin.
2. In a medium bowl, mix together the flour, baking soda, baking powder, salt, and spices. Set aside.
3. Beat the butter at medium speed until soft. Add sugars and beat until light and smooth. Add eggs, one at a time, and then vanilla. Mix in the pumpkin and buttermilk at low speed. 
3. Mix in the dry ingredients at low speed only until incorporated. 'Tis better to use a rubber spatula to mix in the last bits than to over-mix! Stir in the nuts and raisins with said rubber spatula.
4. Divide batter evenly among muffin cups. Bake for 22-25 minutes, or until a thin knife inserted into the center comes out clean. 
5. Cool muffins in the tin on a wire rack for 5 minutes. Remove muffins from tin and cool completely on rack. 

* For the icing, I used Greenspan's recipe for cream cheese icing for a carrot cake. It calls for a stick of butter, 8 oz of cream cheese, a pound of powdered sugar, and a tablespoon of lemon juice. I made a much smaller quantity, of course, but tried to keep the proportions in the same ballpark, except for the lemon juice, which I used lots of. Because that's how I like it.

Tuesday, September 6, 2011

Bolinas Blackberry Pie

My mother used to read Blueberries for Sal to me before bed when I was small.  It was one of my favorite books, in part because eating my way through a bush of blueberries as Sal does seemed like a brilliant idea, and in part because the mother-child mix-up that happens is classic.


This Labor Day weekend, I drove out to rural Marin County to see my dad, and relieve him of some blackberries which grow [a little too] wild in his yard. He hacked at the brambles with a machete while my dog ran amok and I got lost (practically) picking berries. I imagine blackberry bushes are a little more violent than blueberry bushes, since Sal's hands and legs didn't look like mine when she, the bears, and her mom were done picking. Bear claws, though, are pretty near the top of the Potentially Damaging hierarchy.

Since I didn't have to compete with bears, I gathered about nine cups of blackberries. That doesn't include all the ones I ate as I picked, or the ones I dropped as my skin snagged on a thorn and I cursed the entire universe. I gave about a cup to my dad-- I wasn't being stingy. He didn't want more -- and took the rest home to bake in a pie.

I wound up tossing out about a cup of berries this morning, since some were just past their peak. Apparently, blackberries' peak lasts about 3 seconds. Others just got crushed from the weight of the other eight cups stacked on top of them. I froze about a cup to use in smoothies later, so used about six cups of berries in the pie.  I didn't have an official blackberry pie recipe to use, so I combined elements from a few different pie and fruit tart sources, and created what just might become an annual tradition.

For the crust, I used a recipe from Vegetarian Times I'd cut out ages ago but hadn't used yet. The ingredients are simple and the method is easy-- basically, everything is thrown in the food processor and pulsed until the dough comes together. I've already written an ode to the Food Processor (Wo)Man for this very thing; it turns out a perfect crust every time. My lattice was a little gangly and uneven, but for my first attempt, it was Not Bad At All.

For the filling, I started with brown sugar, and lots of it.  My dad and I both noticed that the berries were not as sweet as they've been in years past, which my dad attributes to the lack of warm sunny days this summer. I think it may also be that the brambles are being choked by the two other invasive vines spewing over from other people's yards. (Several blackberry species have also been deemed invasive here in California. Eh, potayto, potahto...) Property lines and semantics aside, I added a little cornstarch to thicken the soupy mess the berries were becoming, and a little lemon juice to brighten up the whole thing.  This is also what goes into the filling for the Rustic Fruit Tart I wrote about. Except with blackberries. Not plums.

I blind-baked the crust to prevent it from getting soggy from berry juice. The problem with this method is that the top edges of the crust brown long before all the rest of it, and sometimes even burn before the pie is ready. The logical solution would be to blind-bake it for less time, but then the bottom wouldn't be baked enough to stay, well, crusty. I might try covering the edges with extra parchment paper next time, with some kind of clamping or folding trick to make the paper stay in place over the edge.  

All things considered, the pie is perfect for the end of summer. It even has tan lines.   


Fine. I admit it. The crust recipe didn't make enough dough for crust AND lattice.


I know! I was a little worried about the whole machete/dog/me combination, too! But I made it out alive. And so did the dog.


Bolinas Blackberry Pie

*If you choose to create a lattice (or any other) design on top, you will need to a) make 1.25 times this amount of dough (use extra water instead of 1/4 egg); b) set aside a small quantity of the dough as you begin Step 5a.  This way, you will create extra dough for the lattice, and still have the original quantity for the crust. 
** Pre-bake times have been adjusted to account for my mistakes. You may need to add another minute or two onto your time.

For the crust
1 1/2 C all-purpose flour
1 TBSP sugar
1/2 tsp salt
1 stick (1/2 C) cold, unsalted butter, cut into chunks
1 egg yolk
1/4 C ice water

1. Pulse flour, sugar, and salt in food processor a few times to combine. Add butter, and pulse 5-6 times, or until mixture resembles coarse sand. 
2. Beat egg yolk and ice water in small bowl with fork. Add to flour mixture in food processor. Pulse just until dough comes together. 
3. Transfer dough to piece of waxed paper or plastic wrap. Press into a flat disk. Wrap tightly and refrigerate at least one hour (or overnight). 
4. Preheat the oven to 400 degrees. 
5a. On a well-floured surface, roll out dough into a circle approximately 1/4" thick and 14" in diameter for a 9" pie plate. Lay crust over pie plate, pressing lightly into bottom and sides. Create a fluted design, if you wish, around the edges by lightly pinching the overhang. 
5b. Also roll out dough reserved for lattice into rectangular shape, 1/4" thick and 11" wide. Cut rectangle into long strips. Set aside.
6. Place parchment paper over the crust (you can cut a circle to fit the bottom, or you can lay strips across the crust that overlap) and weigh down the paper with dried beans. Bake for 10 minutes. Remove beans and parchment paper and bake for another 5 minutes. Top of crust should be just beginning to brown.
7. Reduce heat to 350 degrees.

For the filling
6 C ripe blackberries, washed 
3 TBSP cornstarch
2/3 C brown or granulated sugar (adjust slightly according to sweetness of berries)
1 TBSP lemon juice
1/2 tsp grated lemon zest (optional)

1. Combine all ingredients in a large mixing bowl. Stir gently to combine, coating berries well.
2. Pour berry mixture into pre-baked pie crust. Arrange lattice strips on top.
3. Bake for 30 minutes, or until crust is golden brown and filling is bubbly. 
4. Cool on wire rack for as long as you can wait. 
5. Serve with a dollop of whipped cream or vanilla ice cream.


Sunday, August 28, 2011

World Peace Cookies

Might be the stupidest name for cookies EVER.


Fortunately they are also known as sablés.  Which is still fairly pretentious. But these cookies are good enough to stand up to any name in any language. That must be why about a million other food bloggers have already written about them.


I checked out a book from the library a few months ago whose author I had never heard of. Her name is Dorie Greenspan. I know. Anyway. In the book she tells the story of how her recipe for these cookies was served to her at a swanky party, only the host had no idea it was Greenspan's recipe. Even though it is really some French guy named Pierre Hermés I also hadn't heard of's recipe. I know. But up until this point in the story they are still called sablés and then some other guy told Greenspan that a daily helping of these cookies could ensure world peace, and now they are Stupidest Name Ever cookies. 

I googled the recipe after I'd returned the book to the library and forgotten to photocopy the recipe (copy pages out of a book? who does that?), and discovered that not only had every food blogger and her grandmother written about them, but there exists this exclusive food blogger club of sorts that picks a different recipe each week from that same cookbook of Greenspan's. Then they all make the recipe. Then on Tuesdays, they all write about it on their blogs. It's called Tuesdays with Dorie. Kind of like Tuesdays with Morrie. Except nobody dies. 

Even though I don't get to join the club (membership for this book is closed; I'll scurry to join when her next book comes out) or put that cute little button on my site which demonstrates affiliation with the club (I am SO envious), I am going to blog blog blog about these cookies anyway. Since discovering the recipe, I haven't made any other cookie. Nor do I want to. Ever. They are ridiculously easy to make. The batter can be frozen and popped into the oven whenever unexpected guests arrive, which of course happens to me all the time. The frozen ones are equally as delicious as the not-frozen ones. When does that happen?

Try sprinkling extra salt on top before you bake these cookies. I like Maldon flaky sea salt, but use your favorite.


World Peace Cookies
adapted from Dorie Greenspan's Baking: From My Home to Yours, who took it from Pierre Hermés

1 1/4 C all-purpose flour
1/3 C cocoa powder
1/2 tsp baking soda
11 TBSP butter, at room temperature
2/3 C brown sugar
1/4 C granulated sugar
1/2 tsp fleur de sel
1 tsp vanilla extract
5 oz semisweet or bittersweet chocolate chunks
Flaky sea salt, for sprinkling on top

1. Preheat oven to 325 degrees.
2. Sift together the flour, cocoa powder, and baking soda. Set aside. 
3. Beat butter until fluffy (about 2 minutes). Add sugars, vanilla, and salt. Beat for another minute or two. 
3. Add sifted flour mix to butter mix, being careful not to make a mess (Greenspan advises using a towel to cover the stand mixer bowl when you first add the flour, but I haven't had to do this). Mix until just incorporated. Add chocolate chunks and stir to combine. 
4. Shape dough into two round logs. Wrap in parchment or waxed paper and refrigerate for 3 hours. (At this point you can freeze one of the logs for future baking, if you want.)
NOW you can preheat the oven to 325 degrees!
5. Slice into thin cookies (approximately 1/4" thick) and lay flat on a baking sheet. Sprinkle with a little flaky sea salt. Bake for 12-15 minutes. They will look nearly the same as when you put them in the oven, but they are done. 
6. Cool a minute or two on the pan, then transfer to a wire rack to cool completely. Cookies will become crisper but should not be brittle. 


Batter will seem a little dry and crumbly.


The emptiness of this cookie jar just might bring on World War III.