Showing posts with label breakfast. Show all posts

Friday, June 15, 2012

The Blender Room

A few years ago, I was finishing my Master's program and had to complete an intensive practicum that summer. I was holed up in a room with five or six other candidates, where we provided intensive remediation to students with reading difficulties in the mornings and wrote, debriefed, wrote, attended meetings, and wrote some more in the afternoons. I was fortunate to be assigned to a room with like-minded women who agreed that food was the only way to get us through the demands of practicum. We took turns bringing lunch throughout those weeks, and for my final turn, I thought smoothies would be the perfect light lunch on a hot, humid Chicago summer day.

So I brought a blender.

The news went viral, the old-fashioned way. Maybe it was the whir of the machine, or that we were walking the halls of the building with glasses (like, actually made of glass) of smoothie, but within a few minutes ALL the other candidates heard that we had a blender in our room and were making smoothies. Our professors heard about it from the others. One or two candidates may have asked if they could have some. The smoothies were legendary. Practically.

                                                             **************************

L to R: pineapple-orange-banana, sweet potato, blueberry-banana, everything-but-the-kitchen-sink, spinach-kale-banana.


I started making smoothies around the same time I rowed crew in high school, and would come home from practice even hungrier than the average teenager. Ever since, I've been drinking them as an easily-digestible energy boost before or after workouts, and for breakfast or lunch along with some toast. They're ridiculously easy to make, relatively cost-effective, and lend themselves to endless combinations. I even know some meat heads who will drink them. But only at the gym.

I make mine with non-dairy milk of some kind: soy, almond, hemp, rice, etc. I almost always use banana as the base for my smoothie, in part because the potassium goes well with workouts, and in part because it helps thicken the smoothie. I throw in whatever fruit I have: fresh or frozen, berries or citrus, tropical or North American.

Lately, though, I've wanted to try something a little different. A friend happened to be making a vibrant green smoothie as I was standing in her kitchen, and while the ingredient list didn't make it sound very appetizing, it turned out to taste pretty good. She put several handfuls of baby spinach in the blender, along with some frozen pineapple, protein powder, flax seed oil, and coconut water. It was definitely one of the prettiest smoothies I'd seen in a long time, so I made my own version, adding some kale after seeing a recipe for a greens smoothie on wholefoodsmarket.com. I took the advice of some of the commenters on that site who suggested using a 3:1 or 4:1 spinach:kale ratio. I threw in a banana, a little frozen pineapple, and soy milk and now have a new favorite smoothie. The spinach and kale flavors aren't masked, exactly, but they somehow blend really well with the sweet fruit flavors. There are two things to keep in mind if you make this smoothie:

1. My friend makes this smoothie at night and puts it in a Thermos-type container in the fridge. She grabs it on her way out the door, and it becomes her breakfast while she drives to work. This is a brilliant strategy to save time in the morning while still eating a healthy meal. However, the beautiful green smoothie becomes seriously un-beautiful by morning, and the first time I saw her drink it in the car, I asked, "What IS that?"

2. Green things can get stuck in your teeth.

A fellow food blogger has several videos on her site in which she demonstrates recipes, cooking show-style. In one (episode 8), she makes a sweet potato pie smoothie with leftover sweet potato and a few spices. While I could do without the mmmmmmmmmmms and ooooooooooohs, I loved the idea, so made my own. I didn't use her exact quantities, but added dashes of this, that, and the other. I love the taste of the smoothie, but I haven't mastered the texture yet. Or maybe it's the temperature that isn't right: both times I've made it, I've cooked the sweet potato for the purpose of the smoothie, and so it was either warm or room temperature. If it were cold, and the soy milk were cold, it would probably taste more like a smoothie and less like baby food.

Even the Texan likes smoothies. A few hours after his workout, he makes a smoothie to fuel him until dinner. He uses plain or vanilla yogurt as his base, adds frozen berries, juice, a berry-flavored greens powder, and sometimes chia seeds (which, unlike flax, don't need to be ground to obtain maximum benefit from). The powder, he says, takes some getting used to, but also packs a solid nutritional punch, so a little grit is worth it.

                                                    ********************************


Not only did the news of the blender survive that day and become the talk of the hallway that week, it survived the summer. A few weeks into a fall semester class with a different professor, my friend Patti, who was one of my Blender Room mates, was discussing her practicum experience with the professor. As if little else mattered, she announced to the professor, "... and Mia brought a BLENDER!"

The professor's response? "So I heard."

Monday, February 27, 2012

Bananas, Coffee, and Chocolate


While I am fond of all three ingredients in the title of this post, I was not entirely sure they'd go together well in a muffin. But The Cheese Board: Collective Works cookbook says it's a great combination and that many patrons love these muffins, so I figured scores of Berkeleyans couldn't be wrong.

These are not healthy muffins by ANY stretch of the imagination, but could be modified to be somewhat less bad. The cup of sour cream added a really nice tang to the batter, which was still present after the muffins baked (I was afraid it would dissipate). Plain low-fat yogurt could be substituted, though, and still impart the same basic tang. An entire cup of chocolate chips just isn't necessary; I used a half cup and thought it was more than enough. I also reduced the sugar in the recipe by a tablespoon or two, which turned out just fine.

I was a bit disappointed that the coffee flavor seemed to get lost in the muffins, what with all the banana, sour cream, and chocolate, so it might be worth adding some espresso granules or instant espresso powder to the batter to increase the mocha flavor.


The recipe actually says to fill the muffin cups all the way to the top. When does THAT happen?!


I froze most of the baked muffins, since I can't possibly eat 12 of them in a few days, and have found that when I slice them in half and reheat them in the oven for several minutes, they hold up pretty well. Maybe that's because the stick of butter contains enough fat to prevent them from drying out. Like 47 times over.

The perfect muffins for letting a little kitty cat warm himself on a cold winter morning.

Banana Mocha Chocolate Chip Muffins
from The Cheese Board: Collective Works

makes 12 muffins

1 egg
1 egg yolk
2 ripe bananas, mashed
1/2 tsp vanilla extract
1/2 C strong brewed coffee, cooled
1 C sour cream or plain yogurt
2 1/4 C AP flour
1/4 tsp baking soda
2 tsp baking powder
1/4 tsp salt
3/4 C sugar
1/2 C (1 stick) cold unsalted butter, cut into 1-inch cubes
1/2 - 1 C chocolate chips

1. Preheat oven to 375 degrees. Coat muffin pan with cooking spray and set aside.
2. In a medium bowl, combine egg, egg yolk, bananas, vanilla, coffee, and sour cream or yogurt. Whisk until blended.  Set aside.
3. Sift flour, baking soda, and baking powder together in bowl of stand mixer. Add salt and sugar to dry ingredients. 
4. Add butter and cut in on low speed for about 4 minutes, or until it is the size of small peas. Mix in chocolate chips. Make a well in the center and pour in wet ingredients. Gently mix just until combined. Do not overmix!
5. Scoop batter into prepared muffin pan, filling each well until batter just peeks over top of well. Bake for 25-30 minutes, or until muffins are golden brown, firm, and springy.
6. Let cool in pan for 10 minutes, then unmold and cool completely on a wire rack.

Friday, February 17, 2012

Texas French Toast

Before we started dating, The Texan boasted to me that he knew how to make a mean batch of French toast. He warned that it had a gazillion calories a slice. I was unfazed. He promised to make it for me after the holidays.

On our first date, he asked conspiratorially, "Wanna know the secret ingredient in my French toast?" My mind raced as I considered the possibilities: An exotic spice? Syrup in the batter? A special type of bread?

He leaned in, grinned, and divulged, "Cap'n Crunch cereal!"

Seriously?

He'd come across the recipe, which was featured on Food Network's Diners, Drive-Ins, and Dives, online. It also features 2 cups of heavy cream, a stick of butter, and 6 eggs. Sounded like the perfect way to start the morning. That is, if it were our last morning on earth, since the French toast would probably send us into cardiac arrest.

As we planned the meal, we discussed ways to make it slightly less lethal. I suggested using milk instead of cream, but he wasn't sure whether he should gradually step down from cream to half-and-half, or just jump way down the fat ladder to whole milk. He chose the latter, but not because he thinks my ideas are so great. No, it was a perfect stranger's comment on the recipe, saying she'd used whole milk and it turned out fine, that convinced him it was safe to do. In all fairness, though, he did use my suggestion of cooking spray combined with a little butter to grease the pan in place of the stick of butter the recipe calls for.

Normally, the Texan uses Texas toast for this recipe. Which you totally could have guessed. But he has this bread machine that he thinks is pretty darn cool. And it is, I must admit. For the occasion, he made two loaves of beer bread: one loaf two days before The Breakfast Event, and the other, one day before. We cut both loaves into Texas-sized slices, and drowned and dredged them in all kinds of goodies. As we ate, we realized we preferred the day-old slices, as they seemed to have better absorption of the cream-I-mean-milk mixture, creating a tastier, softer French toast.


The Texan was in charge of the cooking, firing up not one but two pans for the event. And I do mean firing: a few minutes into the process, I noticed a slightly smoky smell in the kitchen. I fanned the back door a few times. The smoke increased. I opened a window. The smoke detector went off. His roommate and I opened many windows, and I checked the flames under the pans. They were Very High.

Because that's what men do.

There is already about a week's worth of sugar in the Cap'n Crunch coating, so maple syrup is not really necessary (nor advised). I put some frozen raspberries in a saucepan, along with a spoonful or two of raspberry jam, and cooked them to form a syrupy topping for the French toast. We put a few dollops of whipped cream next to the raspberry sauce, and one particular roommate may have created a smiley face or two on her breakfast even though she is no longer 8 years old. Clearly, she knew she might keel over from this meal, and wanted to make it memorable.

And it was.


Texas-Sized French Toast
http://www.food.com/recipe/capn-crunch-french-toast-311788

6 eggs
5 TBSP sugar (you could cut some or all of this out)
2 C heavy cream (or whole milk)
1  tsp vanilla extract
1/2 tsp ground cinnamon
1/2 tsp ground nutmeg
1/2 C (1 stick) butter
1 box Cap'n Crunch cereal
1 loaf thick toast 

1. Crush cereal in a resealable bag or baking dish, but do not turn the entire thing into dust. Spread cereal into baking dish or large plate.
2. Combine eggs, sugar, cream or milk, vanilla, and spices in a bowl large enough to fit a slice of toast.
3. Preheat pan(s) or griddle, using medium heat. Coat pan with cooking spray and a thin pat of butter.
4. Meanwhile, soak pieces of toast in milk mixture, 30 seconds per side, making sure to moisten edges of bread. Dredge in crushed cereal.
5. Cook slices for 3 minutes per side, or until browned but not burned (sugar in cereal will burn if heat is too high). Keep in warm oven until ready to serve.
6. Top with raspberry sauce or fresh fruit and whipped cream, if desired.


Monday, November 28, 2011

Sugar, Sugar

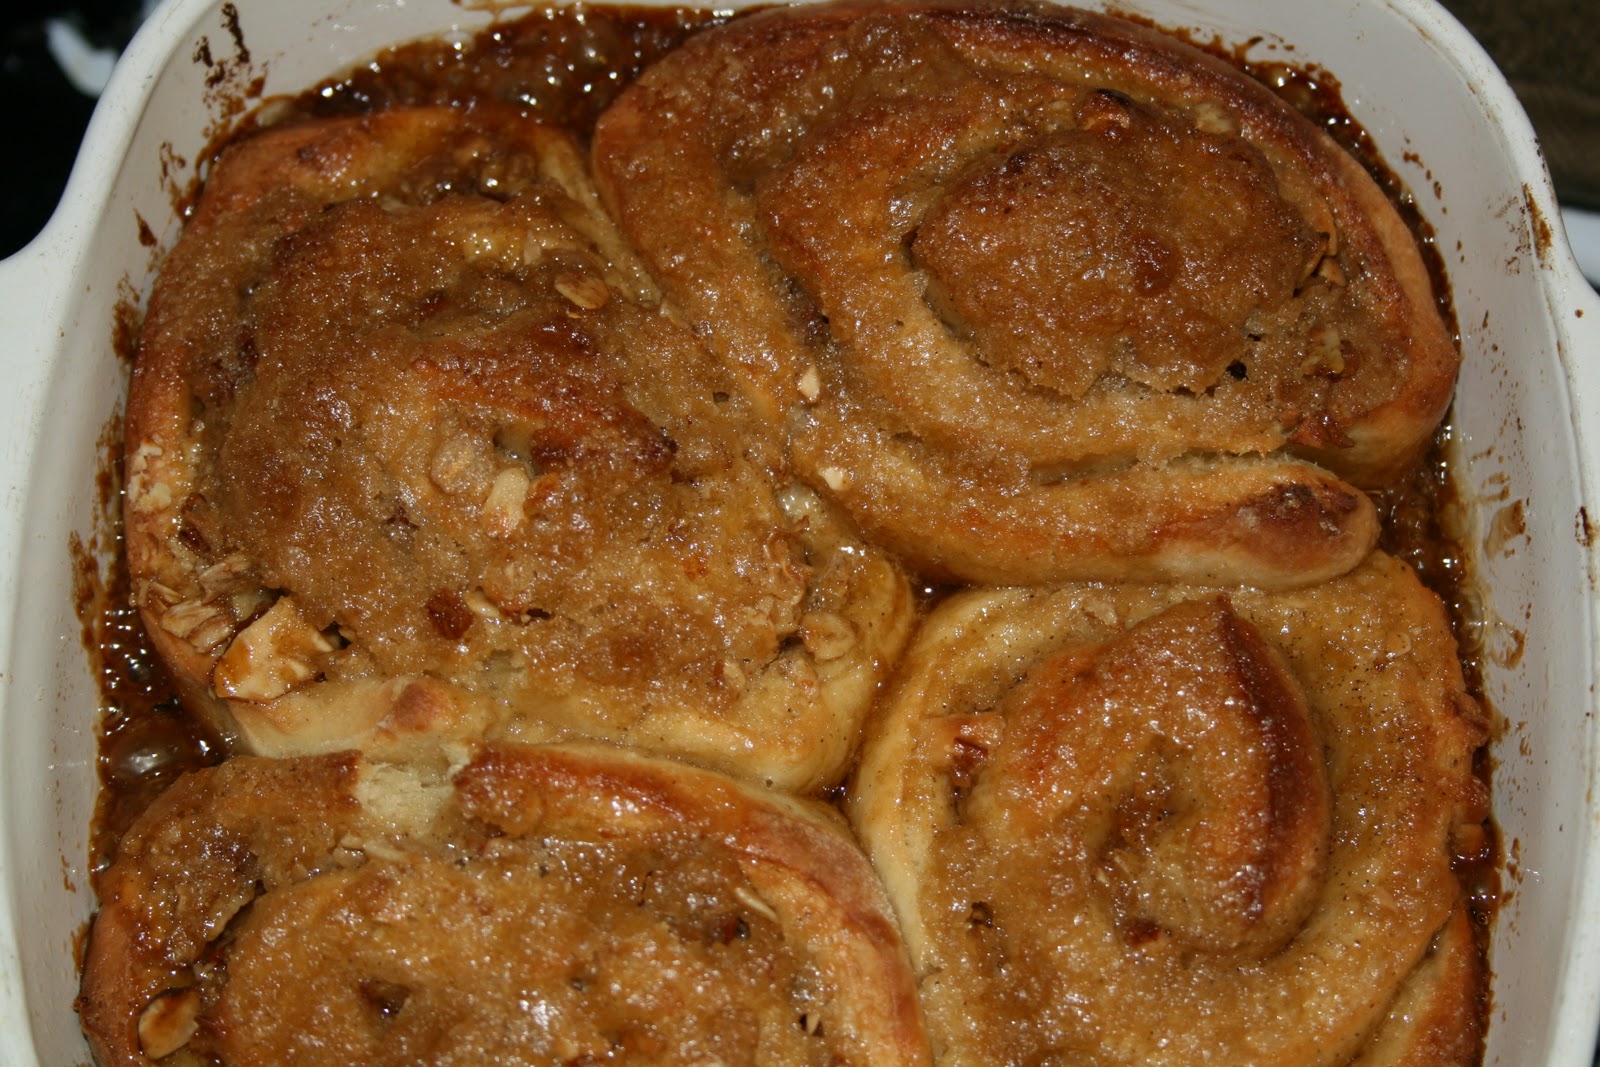
Version 1, with syrup on bottom.
Because I didn't stuff myself quite silly enough over Thanksgiving weekend, I made these as soon as all the pumpkin pie was gone.


When I was a teenager, my mother subscribed to Center for Science in the Public Interest's monthly magazine, which ran exposés on all the artery-clogging restaurant foods in existence. One of which were Cinnabons, which in my opinion are the best non-food food at the mall. Not that I ever eat them. Or go to malls. That's just what I've heard.

One of the obscure flours I mentioned in an earlier post that has been waiting to be used is oat flour. I found a recipe for Double Oat Morning Buns, which I hoped would be like cinnamon rolls. Or snails. Or Cinnabons. Except with cardamom. And because I found the recipe on the Bob's Red Mill website, I figured it'd be relatively healthy, if not downright dull.

I figured wrong.

I realized my wrongness as I started Step 1, which is to combine just three ingredients for the sticky mixture that gets caramelized all over the place. The ingredients were sugar, maple syrup, and butter.  Delicious, for sure. But not even a little bit healthy.

Then in Step 2 I figured I'd even out the butter-sugar chaos with some fiber-licious oat flour. I did, but I also had to add more butter, more sugar, some eggs, and a cup of milk.  Which has calcium and protein and whatnot, but still.

Step 4 brought-- yes, that's right-- more sugar. Oh, and a tiny bit of rolled oats to up the fiber count. And cardamom. I love cardamom. If you don't, you can substitute cinnamon, with maybe a little allspice or cloves.

I started this recipe last night, because I knew the dough needed to be refrigerated for a bit, and I thought popping these in the oven first thing in the morning would be just like a Folger's commercial, only with baked goods. There is a non-refrigeration option, so I put the odds and ends of the dough in the oven last night with a little of the sugar-syrup mix on the bottom of the pan, as directed. But the buns I got were dry on top, and could have used more butter after baking. Furthermore, the sugary mix on the bottom got all overcooked and one corner of it almost burned. No good.

This morning, I decided to put the sugar mix on top of the buns and bake, letting it all run down the sides. You know, like at Cinnabon, but without the cream cheese icing. This did the trick-- soft, almost spongy dough, texture from the almond-oat-cardamom filling, and sweetness from the syrupy mess on top. All this amounts to the perfect way to start the day: in cardiac arrest. Just like at Cinnabon.

Version 2, with syrup running down the sides


Double Oat Morning Buns
adapted from www.bobsredmill.com
makes 18 buns-- cut recipe in half if you can't use that many

For the sugar mixture:
1/2 C maple syrup
1/3 C packed brown sugar
1/4 C butter

For the dough:
1 TBSP active dry yeast
1 C oat flour
3 to 3 1/2 C AP flour
1 C milk
1/4 C granulated sugar
1/4 C butter
1 tsp salt
2 eggs
2 TBSP butter, melted

For the filling:
1/3 C almonds, toasted and chopped
1/4 C packed brown sugar (you can probably use about half this much and get good results)
1/4 C rolled oats, toasted (you could double this amount for more texture)
1/4 tsp cardamom (I used 3/4 tsp)
1 TBSP butter, melted

I've changed the order of the steps, because the sugar mixture doesn't need to be made until just before these go in the oven. However, it can be made ahead and kept at room temperature until needed. 
1. Combine 2 cups of AP flour and yeast in the bowl of a stand mixer.
2. Combine milk, granulated sugar, 1/4 C butter, and salt in a saucepan over low heat until just warm and butter is melted (115-120 degrees F).  Add to flour mixture, and stir to combine. Add eggs. Beat at low speed for 30 seconds, and then scrape down sides of bowl. Beat 3 minutes at medium-high speed. Using a spoon, stir in the oat flour and as much of the remaining AP flour as you can. Turn dough out onto lightly floured work surface.
3. Knead in enough of the remaining AP flour to make a moderately stiff dough that is smooth and elastic (6-8 minutes, total). Place in a lightly greased bowl, turning once to coat. Cover and let rise in a warm place until doubled in size (1 to 1 1/4 hours).
4. Combine filling ingredients EXCEPT butter in a small bowl. Coat a 13" x 9" x 2" baking pan with cooking spray.
4. Punch down dough and divide in half. Cover dough and let it rest for 10 minutes. On lightly floured work surface, roll one half of dough into 9" x 6" rectangle. Brush top with melted butter.  Sprinkle half of filling mixture over melted butter on dough. Roll up jelly-roll style. Cut into 1-inch rounds and place cut side down in prepared pan. Repeat with remaining half.
5. Cover with plastic wrap and refrigerate at least 2 hours, or overnight.
6. Preheat oven to 375 degrees F. Remove buns from refrigerator and let stand at room temperature for 20 minutes. If any surface bubbles have formed, puncture with greased toothpick. Combine mixture ingredients in a saucepan, and stir over low heat until butter is melted and sugar is dissolved. DO NOT BOIL. Coat tops of buns evenly with mixture. Bake for 20-25 minutes. Cool slightly before serving.

Saturday, October 8, 2011

Pumpkin Spice Muffins

 There's no  pumpkin in these muffins.

I bought an enormous butternut squash for another recipe, and quickly realized I had way too much. I considered making a pie, since it is officially time for the orange flesh + cinnamon + cloves + nutmeg combination. But pies are big. I wanted something smaller. And butternut squash could easily stand in for pumpkin in these fabulous little muffins.

Since I had already baked the squash, I threw the unused portion into the food processor to purée it. This makes better-than-canned pumpkin. Or baby food. Whatever. The purée was sweeter than canned pumpkin, so I reduced the sugar in the recipe by about an eighth of a cup. I also used hazelnuts instead of pecans or walnuts, because that's what I had. I toasted them in the oven before I added them to the batter, because that's how I like them.

The recipe calls for unsalted raw sunflower seeds to be sprinkled on top of the muffins just before baking. Clearly, this would make them all earthy-crunchy-granola. These are listed in the "Breakfast Sweets" section of Dorie Greenspan's Baking, and while breakfast + sweets = oxymoron, there's no point trying to healthify things now. Face it, Greenspan: a few sunflower seeds will not neutralize an entire stick of butter for breakfast.

Muffins are best eaten the day they are made.  This disclaimer appears next to each muffin recipe in Baking, and in the directions of many other muffin recipes I've encountered. It's true, of course, but here's my alternate interpretation:  Find something moist and delicious to spread on the muffins on Days 2 and 3.  Butter is not an option, since cold butter spread on room temperature muffins creates Crumbs. Something spreadable would be perfect. Like cream cheese.

Starbucks has these pumpkin-cream cheese muffins with the glob of cream cheese built into the center of the muffin before baking. Mine were already baked, but I thought a little cream cheese icing would be perfect. Maybe with a little lemon juice to create a tart-sweet effect. I beat together some cream cheese, a few tablespoons of butter, a little powdered sugar, and some lemon juice and got the perfect spread. But my spreading attempts were not pretty. 


I remembered I had some piping tools in a drawer that I never use, so I gave the vintage one of my mother's a try. I wasn't sure about putting anything with acid in a metal container, but since the Icing Debacle lasted only a few minutes, I did it anyway. So far, I haven't died. And my icing is not Metal Flavored. 

My decorating skills, however, leave a lot to be desired. This is probably why the tools have stayed untouched in that drawer for ages. Yeah, I know-- chicken or egg. Anyway. The fancy star attachment did not magically create starry designs on my muffins. I thought it might be because my muffins have pointy tops, so I tried cutting off a muffin top and putting the icing on the now-flat surface. But, as everyone who watches Seinfeld knows, the muffin tops are the best part. So I put it back on. Somehow, I don't think that's what Elaine meant.


Many thanks to Kahori of Chuzai Living for telling me about Picasa and its nifty collage feature. Plus, I went to see the Picasso exhibit at the de Young museum last weekend. That guy had some issues. But he also had that whole collage thing down pat.


Pumpkin Spice Muffins
adapted from Baking: From my home to yours by Dorie Greenspan
makes 12 muffins

2 C all-purpose flour
2 tsp baking powder
1/4 tsp baking soda
1/4 tsp salt
3/4 tsp ground cinnamon
1/2 tsp ground ginger
1/8 tsp grated nutmeg (I used just a pinch)
a pinch of ground allspice (I used 1/4 tsp)
1 stick (8 TBSP) butter, at room temperature
1/2 C granulated sugar
1/4 C packed brown sugar 
2 eggs
1/2 tsp vanilla extract
3/4 C canned unsweetened pumpkin 
1/4 C buttermilk (I used 2% milk with about a teaspoon of lemon juice mixed in; let stand for 10 mins) 
1/2 C raisins
1/2 C chopped pecans, walnuts, or hazelnuts (try them toasted first!) 

1. Preheat oven to 400 degrees. Spray 12-cup muffin pan with cooking spray. If you use paper cups, spray the insides so they release the muffins instead of tearing off half your muffin.
2. In a medium bowl, mix together the flour, baking soda, baking powder, salt, and spices. Set aside.
3. Beat the butter at medium speed until soft. Add sugars and beat until light and smooth. Add eggs, one at a time, and then vanilla. Mix in the pumpkin and buttermilk at low speed. 
3. Mix in the dry ingredients at low speed only until incorporated. 'Tis better to use a rubber spatula to mix in the last bits than to over-mix! Stir in the nuts and raisins with said rubber spatula.
4. Divide batter evenly among muffin cups. Bake for 22-25 minutes, or until a thin knife inserted into the center comes out clean. 
5. Cool muffins in the tin on a wire rack for 5 minutes. Remove muffins from tin and cool completely on rack. 

* For the icing, I used Greenspan's recipe for cream cheese icing for a carrot cake. It calls for a stick of butter, 8 oz of cream cheese, a pound of powdered sugar, and a tablespoon of lemon juice. I made a much smaller quantity, of course, but tried to keep the proportions in the same ballpark, except for the lemon juice, which I used lots of. Because that's how I like it.

Sunday, September 25, 2011

Flour Power


I collect flours. Or so it would seem.   

Blue corn meal? Yeah, I got that. Semolina? Yep, got it. And whole wheat. And buckwheat. And bread flour, and AP flour, and oat flour too.

What I don't got is a lot of recipes to use them all up. Bob's Red Mill has recipes on its website for all these flours, but some of them sound a bit, um, dry. Like Quinoa-Peanut Butter Cookies. Or High Fiber Crunch Cookies. Ouch.

Enter Gian Who Has A Recipe For Everything. And his grandmother does too, apparently, including a recipe for Buckwheat Pancakes from 1917. Gian says "the past is tangibly resurrected" by preparing old recipes. I agree, but I confess I tend to prepare them with a modern twist. So I took this recipe, which Gian likes to top with molasses (now THAT is old-fashioned!), and adapted it to my new, electric, non-stick waffle maker. Totally 21st century.

Most of the waffles I've made so far have been fairly light and airily crisp, though I have always thrown in a bit of whole wheat flour.  I knew that buckwheat waffles would be darker, of course, and perhaps a teensy bit denser, but I wasn't quite prepared for the gumminess of the batter. It really didn't have that it's-Sunday-morning-and-I-can't-wait-for-syruppy-waffles kind of vibe. At all. But I do love all things vintage, so I carried on.

The first few buckwheat waffles I made were a little buckwheat-y, so I needed a boost in the flavor department. As I eyed the bottle of molasses that Gian swore was great on top of the waffles, I was hit with an idea: put the molasses in the waffles.   The flavor was vastly improved, but the added sugar made the waffles stick to my non-stick waffle maker. Which is irritating in any century. Fortunately, someone invented cooking spray a few decades ago, so I used that.

Oooh, it's just like 1917. Only with soy milk.


Thick and gummy...


I added a tablespoon or two to the recipe (which I halved), and threw in a little allspice and ground ginger, too. I sprayed the bejeezus out of the waffle iron, and cooked the waffles a little past the green indicator light. They turned out pretty well, especially drowned in maple syrup, and had decent amounts of protein and fiber, since buckwheat is high in both. This is important for counteracting the 80 trillion grams of sugar in the syrup.  Something fruity, such as marmalade or a compote, would pair nicely with the deeper, darker flavor of the waffles.

But I'm not at all sure Gian's Sicilian grandmother was into fruity compotes.

These were made with the revised recipe, not the old-timey recipe.


**NB: I made these waffles again on October 23, with several major differences:
-I basically reversed the ratio of flours, using 3/4 C AP : 1/4 C buckwheat. I think this made the entire batter far less gummy and thick.
-I used 1/2 TBSP baking powder
-I used more oil-- probably in the range of 2-3 TBSP.
-I added an egg.
-I used a little less liquid (1 C soy milk). 
-I replaced the molasses with barley malt syrup. This is not because I think barley malt syrup is so great. It's because I paid nearly $6 for the bottle and so far have used a grand total of 2 tsp. 

These waffles were easier to work with, since the batter was thinner and less sticky. I still coated the waffle maker with cooking spray to be safe, but I suspect they would have been less likely to stick than the gooey ones.   The flavor was less buckwheat-y but still more intense than plain AP waffles would be, so it's 1/4 C buckwheat for the win.

Old-Timey Modern Buckwheat Waffles
adapted from Gian's Sicilian grandmother

1 C buckwheat flour
1/2 C AP flour
3 tsp baking powder 
1/2 tsp salt
1/2 TBSP canola oil, melted butter, or lard (hey, I said it was old-timey)
1 1/4 C milk, water, soy milk, or buttermilk (or a combination)
2 TBSP molasses
1/2 tsp ground allspice
1/2 tsp ground ginger
cooking spray

1. Preheat waffle maker.
2. Sift together flours, salt, spices, and baking powder.  
3. Add wet ingredients and mix well with a wire whisk, electric beaters, or stand mixer. You may need to add a few more tablespoons of water or milk to achieve a pourable consistency.
4. Spray waffle iron with cooking spray on both top and bottom. Fill iron with batter according to manufacturer's directions. Waffles will turn chestnut brown when done.
5. Top with maple syrup, butter, and/or fruit, as desired.

Friday, August 19, 2011

Even Oprah Makes Mistakes


I have never eaten proper Southern biscuits. Probably because I have never been south of the Mason-Dixon Line. I might not even recognize the difference between proper biscuits and improper ones. I can't think of any restaurants I go to that serve biscuits, plain or topped with gravy. Nobody I know claims to be a Biscuit Maker Extraordinaire.

Fans of Oprah gave her grief over her biscuit-making scene in "Beloved" many years ago. One woman told her flat out, "You are making your biscuits wrong."  Apparently 'wrong' is relative, though, since there are as many variations on biscuit recipes as there are on, well, everything else.  The elders in my family have passed down several of these recipes that must be made a certain way; anyone who does not make them this way is automatically an idiot.
Or so they say.

The article's author insisted that Northerners can make good biscuits (am I a Northerner? a Westerner? a Californian, which seems to be its own category?), so I decided to see for myself, though I had no intention of drowning perfectly good biscuits in fat-choked sausage gravy. My sweet tooth usually prevails anyway, so I figured maple syrup would drown them just as well as gravy, and I had a hankering for baked beans, which I sort of associate with all things Southern and biscuit-like.

One thing's for sure: biscuits really are easy. I used regular old AP flour and regular old unsalted butter. I used my food processor to cut in nearly frozen butter (Oprah's very vocal fan must be horrified right now) and had dough ready in under 5 minutes. I let it rest for 30 minutes as directed, and got what I think are pretty proper biscuits out of the oven.

I have no idea what Oprah did wrong, but if hers tasted like mine, I bet she didn't care.


They baked up a little lopsided. I suspect uneven heat in the oven is to blame. Whatever. The flavor is fab.


All-Purpose Biscuits
recipe lifted straight out of the New York Times magazine, 7.21.11
serves 6-8

2 C all-purpose flour (plus a little more for dusting)
2 TBSP baking powder
1 TBSP sugar
5 TBSP cold unsalted butter
1 C whole milk

1. Preheat oven to 425 degrees.
2. Sift dry ingredients into a large mixing bowl. Transfer to bowl of food processor. Cut butter into smaller pieces and add to flour mixture, pulsing 5-6 times or until mixture resembles rough crumbs. (You could also cut butter into flour with a fork or pastry cutter.)
3. Return mixture to mixing bowl and add milk. Stir until it forms a rough ball.
4. Turn dough out onto a well-floured surface. Pat it down into a rough rectangle, about 1 inch thick. Fold over and gently pat it down again. Repeat once more. Cover dough loosely with a kitchen towel and let rest for 30 minutes. 
5. Gently pat out dough a bit more to form a rectangle that is approximately 10" x 6". Cut dough into biscuits with a biscuit cutter or floured glass. DO NOT twist cutter when cutting; this crimps the edges of the biscuit and impedes its rise. You can reform the remnants into another rectangle and cut out more, but know that these will be slightly less airy than the first batch. You can also bake the remnants as free-form biscuits with minimal handling (and therefore toughening). 
6. Bake on a cookie sheet until golden brown, approximately 10-15 minutes.
7. Drown in syrup, honey, or molasses.


Wednesday, June 15, 2011

She's Such a Granola

Last week, I was supervising three students while eighty-something of their peers went on an end-of-year field trip. As these three watched a movie, one began helping herself to a bag of granola that belonged to the teacher whose room we were using had broken into. A second student commented, "That stuff is so NASTY. Ugh. How can you eat that?" The first replied, "Well, Mr. [Granola Owner] loves it. He eats it all the time. So." The third kept quiet, but also didn't eat a single clustered oat out of that bag.

I was reminded of similar conversations at my own high school in which we labeled health- and environmentally-conscious students "granolas." I don't think I got labeled a granola, though I not only ate granola, but ate HOMEMADE granola, which is even more granola than eating the store-bought kind.

Years later, I craved my dad's homemade granola, and wanted to change the stigma of granola from Something That Burned-Out Hippies Eat to Something That Martha Stewart Would Make. I called my dad for the recipe, thinking he had invented his, or at least had modified it significantly from its original source. But no, his recipe was lifted directly from some 1970s vegan how-to-get-holy-while-chanting-naked-with-of-all-your-white-hippie-friends cookbook that was probably printed on reclaimed toilet paper and bound with recycled inner tubes. He told me he began making it during his kitchen shifts at sesshin, his Zen Buddhist meditation retreats. While he was fully clothed, I'm sure, this news was not any I intended to spread around my social circles, and would definitely not convince skeptics of the merits of granola.

Mr. Granola Owner Teacher, though, may be just the ally granola and I need. He happens to be in the middle of a health and fitness campaign whereby he has lost over 30 pounds and competed successfully in his first triathlon. All this, of course, is attributable to his love for and liberal use of granola. 


Non-flavored, Non-Naked Granola
adapted from Some Hippie Cookbook

4 cups rolled oats
1/4 to 1/2 cup sunflower seeds
1/2 cup walnuts (sometimes I like to add halved almonds too)
1/2 tsp salt
1/4 cup honey (I use agave)
1/8 cup oil, such as canola
1 tsp vanilla extract
1/2 cup raisins


Preheat oven to 325 degrees.
1. Mix together oats, salt, sunflower seeds, and walnuts. 
2. In a separate bowl, combine oil, honey or agave, and vanilla. 
3. Add wet ingredients to dry, and coat oat mixture evenly. Spread on shallow baking sheet. 
4. Bake for 20-25 minutes, stirring every 8-10 minutes. Mixture will be slightly wet but golden brown. 
5. Add raisins. Store in airtight container.

NOTES
*The original recipe says to add the walnuts at the end, but I like them toasted, so I include them in the mix to be baked. 
* You can add other goodies to the mix, such as cranberries, dried apple bits, or cherries. Other nuts work well, too. One of my recent batches included unsweetened shredded coconut. Fabulous.

*This recipe is fairly low in sugar, so it doesn't form the clusters that commercial granola does. This is great for those monitoring their sugar intake, but less great for teachers and their students who like to eat granola straight out of the bag. I like eating it as a cereal in the morning with a bit of milk. 

*Fresh fruit is fantastic in the bowl in the morning. Sliced banana and blueberries are my favorites.