Monday, November 28, 2011

Sugar, Sugar

Version 1, with syrup on bottom.
Because I didn't stuff myself quite silly enough over Thanksgiving weekend, I made these as soon as all the pumpkin pie was gone.


When I was a teenager, my mother subscribed to Center for Science in the Public Interest's monthly magazine, which ran exposés on all the artery-clogging restaurant foods in existence. One of which were Cinnabons, which in my opinion are the best non-food food at the mall. Not that I ever eat them. Or go to malls. That's just what I've heard.

One of the obscure flours I mentioned in an earlier post that has been waiting to be used is oat flour. I found a recipe for Double Oat Morning Buns, which I hoped would be like cinnamon rolls. Or snails. Or Cinnabons. Except with cardamom. And because I found the recipe on the Bob's Red Mill website, I figured it'd be relatively healthy, if not downright dull.

I figured wrong.

I realized my wrongness as I started Step 1, which is to combine just three ingredients for the sticky mixture that gets caramelized all over the place. The ingredients were sugar, maple syrup, and butter.  Delicious, for sure. But not even a little bit healthy.

Then in Step 2 I figured I'd even out the butter-sugar chaos with some fiber-licious oat flour. I did, but I also had to add more butter, more sugar, some eggs, and a cup of milk.  Which has calcium and protein and whatnot, but still.

Step 4 brought-- yes, that's right-- more sugar. Oh, and a tiny bit of rolled oats to up the fiber count. And cardamom. I love cardamom. If you don't, you can substitute cinnamon, with maybe a little allspice or cloves.

I started this recipe last night, because I knew the dough needed to be refrigerated for a bit, and I thought popping these in the oven first thing in the morning would be just like a Folger's commercial, only with baked goods. There is a non-refrigeration option, so I put the odds and ends of the dough in the oven last night with a little of the sugar-syrup mix on the bottom of the pan, as directed. But the buns I got were dry on top, and could have used more butter after baking. Furthermore, the sugary mix on the bottom got all overcooked and one corner of it almost burned. No good.

This morning, I decided to put the sugar mix on top of the buns and bake, letting it all run down the sides. You know, like at Cinnabon, but without the cream cheese icing. This did the trick-- soft, almost spongy dough, texture from the almond-oat-cardamom filling, and sweetness from the syrupy mess on top. All this amounts to the perfect way to start the day: in cardiac arrest. Just like at Cinnabon.
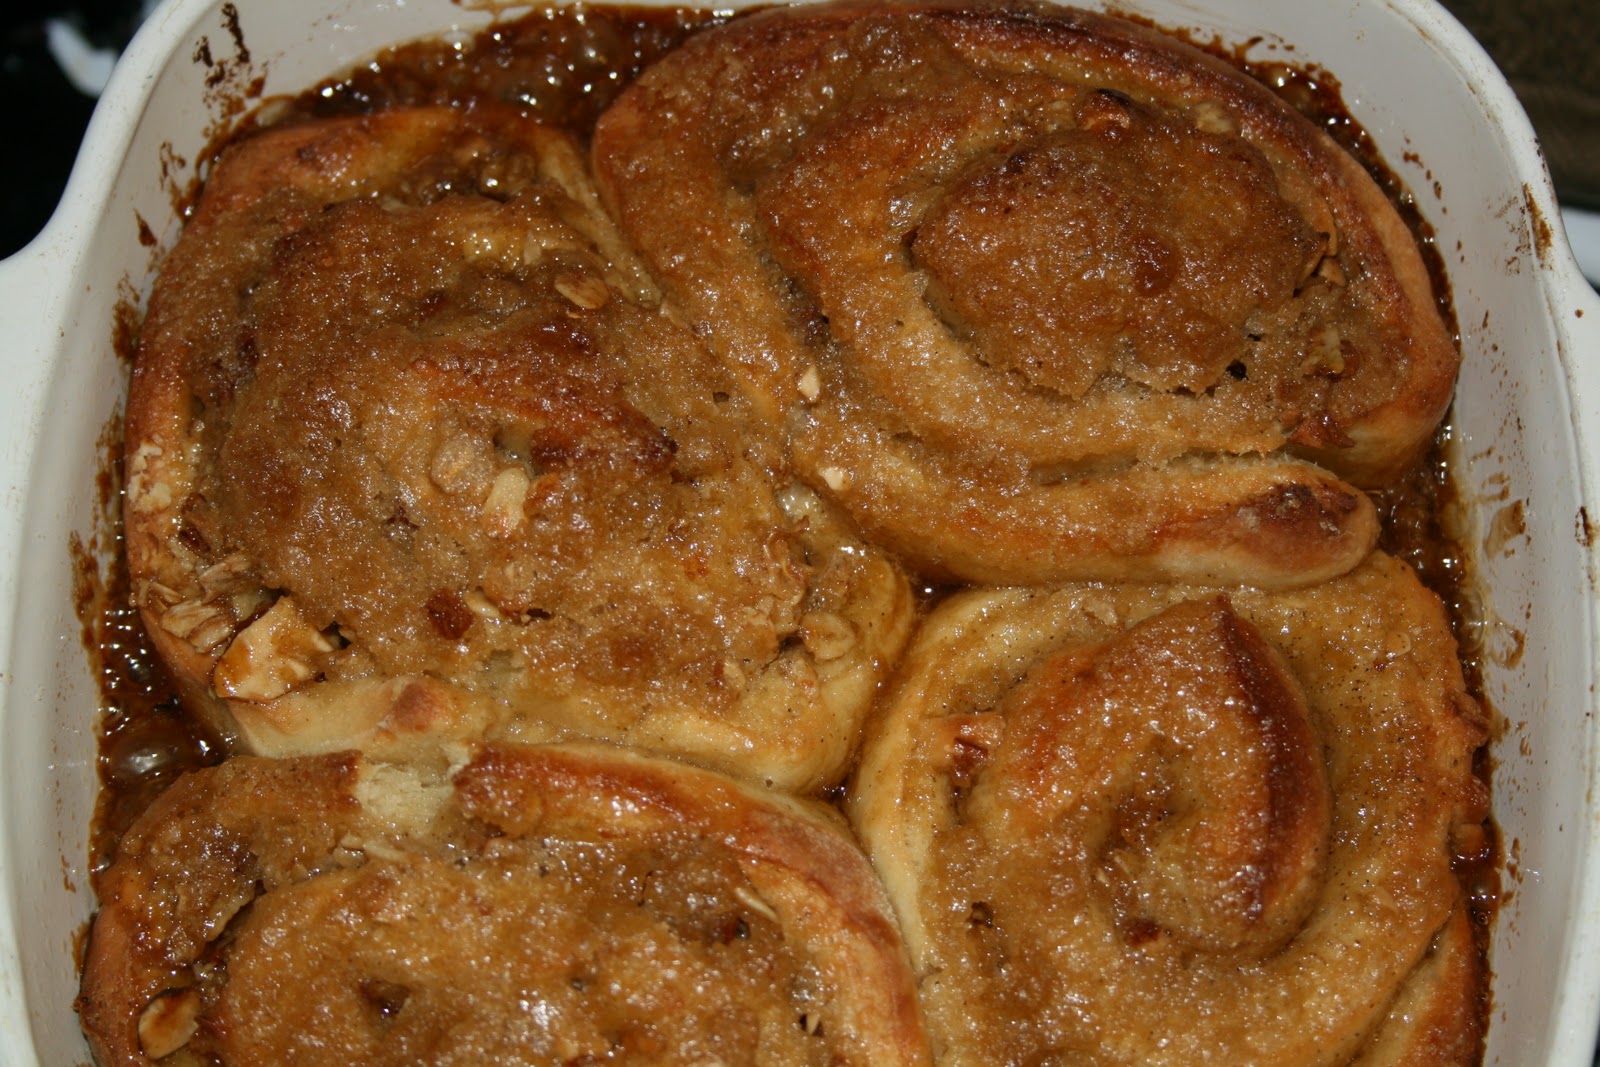
Version 2, with syrup running down the sides


Double Oat Morning Buns
adapted from www.bobsredmill.com
makes 18 buns-- cut recipe in half if you can't use that many

For the sugar mixture:
1/2 C maple syrup
1/3 C packed brown sugar
1/4 C butter

For the dough:
1 TBSP active dry yeast
1 C oat flour
3 to 3 1/2 C AP flour
1 C milk
1/4 C granulated sugar
1/4 C butter
1 tsp salt
2 eggs
2 TBSP butter, melted

For the filling:
1/3 C almonds, toasted and chopped
1/4 C packed brown sugar (you can probably use about half this much and get good results)
1/4 C rolled oats, toasted (you could double this amount for more texture)
1/4 tsp cardamom (I used 3/4 tsp)
1 TBSP butter, melted

I've changed the order of the steps, because the sugar mixture doesn't need to be made until just before these go in the oven. However, it can be made ahead and kept at room temperature until needed. 
1. Combine 2 cups of AP flour and yeast in the bowl of a stand mixer.
2. Combine milk, granulated sugar, 1/4 C butter, and salt in a saucepan over low heat until just warm and butter is melted (115-120 degrees F).  Add to flour mixture, and stir to combine. Add eggs. Beat at low speed for 30 seconds, and then scrape down sides of bowl. Beat 3 minutes at medium-high speed. Using a spoon, stir in the oat flour and as much of the remaining AP flour as you can. Turn dough out onto lightly floured work surface.
3. Knead in enough of the remaining AP flour to make a moderately stiff dough that is smooth and elastic (6-8 minutes, total). Place in a lightly greased bowl, turning once to coat. Cover and let rise in a warm place until doubled in size (1 to 1 1/4 hours).
4. Combine filling ingredients EXCEPT butter in a small bowl. Coat a 13" x 9" x 2" baking pan with cooking spray.
4. Punch down dough and divide in half. Cover dough and let it rest for 10 minutes. On lightly floured work surface, roll one half of dough into 9" x 6" rectangle. Brush top with melted butter.  Sprinkle half of filling mixture over melted butter on dough. Roll up jelly-roll style. Cut into 1-inch rounds and place cut side down in prepared pan. Repeat with remaining half.
5. Cover with plastic wrap and refrigerate at least 2 hours, or overnight.
6. Preheat oven to 375 degrees F. Remove buns from refrigerator and let stand at room temperature for 20 minutes. If any surface bubbles have formed, puncture with greased toothpick. Combine mixture ingredients in a saucepan, and stir over low heat until butter is melted and sugar is dissolved. DO NOT BOIL. Coat tops of buns evenly with mixture. Bake for 20-25 minutes. Cool slightly before serving.

Wednesday, November 16, 2011

Woman, where's my dinner?

Many years ago, I dated a man from a rather, um, patriarchal culture. He expected a meat-centric dinner, piping hot, whenever he stayed at my house. Note I didn't say he helped me prepare a meat-centric dinner.

My cooking skills were still under development at that time. (In truth they always will be, but they have improved tremendously.) I knew which flavors I liked, and which ingredients I was willing and able to use, but didn't always have technique perfected, nor did I have much patience for dishes that needed to simmer for hours on end. Those simmery dishes, though, are the ones that are usually filled with meaty bits and starchy bits, good for filling this man's professional-athlete appetite and quieting his inquiries as to the status of his next meal.

I remembered my mother making beef stew many times, which she usually served over egg noodles. She also used the terms 'beef stew' and 'bouef bourguignon' interchangeably, at least as far as my adolescent ears could tell. I knew she put some wine into the dish, and carrots and maybe celery, but I didn't know how to make it, exactly. Or if there were some small but important distinction to be made between stew and bourguignon, besides that Julia Child made the latter and we Irish made the former.

Determined to show his chauvinistic self I could do it, I called my best friend and begged her to tell me what to do. I knew she'd know, since she'd had more than one live-in boyfriend and was adept at cooking for them.  She told me to cook it for a while, which I thought I did, but apparently not long enough. It never came out quite right, and the wine flavor was never quite tame enough. He always gave me his full, unabridged critique.

Years (and relationships) later, I have finally learned to be patient with meat. I cook my stews long enough to create depth of flavor, and really tender meat. But I hadn't made a real bouef bourguignon until now. Julia Child made it famous, but Ina Garten made it simple: Barefoot in Paris contains a recipe with an introductory note specifically saying how un-fun it is to cook this dish all day long. To which I say, Amen, sister!


I leave the skin on the potatoes for a bit of added color and texture.


I was skeptical about using two different kinds of meat in one dish. To me, that always seems like flavor confusion, since each meat (e.g. beef, pork, chicken) has its own unique flavor. Well, maybe not chicken, since everything tastes like chicken, but beef and pork certainly do. Nevertheless, I seared the beef in the bacon drippings, as directed, and then coated the vegetables with all that fat and a few herbs, too. The wine went in early on, and combined with some broth and a little roux at the end to create a rich, flavorful gravy that could stand alone over mashed potatoes. 

Ina Garten suggests serving the dish with some country bread that has been toasted and spread with a bit of olive oil and garlic. My neighbor just happened to make a loaf the same night I made bouef bourguignon, so I ate it with both bread and mashed potatoes. I'm sure Julia Child and the entire nation of France would be horrified, but if ever there were a bowl full of Man Food, this is it.


Mia's cooking: 1, Patriarchy: 0


Bouef Bourguignon
adapted from Barefoot in Paris by Ina Garten

**I started with 1/2 lb beef and 1/3 bottle wine, and adjusted the rest of the ingredients accordingly, since I made this for myself and not for the entire Russian army. I also cooked mine on the stovetop, not in the oven, since I don't have a Dutch oven.

1 TBSP olive oil (I omitted this, since the bacon will render off plenty of fat)
8 oz bacon, diced (I used applewood-smoked bacon)
2 1/2 lbs beef stew meat
1 lb carrots, sliced diagonally into 1-inch chunks 
2 yellow onions, sliced
2 cloves garlic, chopped
1/2 C Cognac or brandy (I omitted this)
1 (750mL) bottle dry red wine
2  to 2 1/2 C canned beef broth (I used low-sodium vegetable broth)
1 TBSP tomato paste
1 tsp fresh thyme leaves (I used dried)
4 TBSP unsalted butter, at room temperature, divided
3 TBSP all-purpose flour
1 lb frozen small whole onions (I omitted these)
1 lb mushrooms, sliced (I omitted these)
Salt and pepper to taste

1. Preheat oven to 250 degrees, if using a Dutch oven.
2. Heat a Dutch oven or other large pot. Add bacon and cook over medium heat for 8-10 minutes, stirring occasionally, until the bacon is lightly browned. Remove bacon from pan with a slotted spoon and set aside. 
2. Sprinkle beef cubes with salt and pepper. In a single layer (work in batches if necessary), sear the beef in the bacon fat 3-5 minutes, until brown on all sides. Remove beef cubes from pan and set aside with bacon. 
3. Toss carrots, onions, some salt and pepper (I added thyme here too) into fat in pan and cook over medium heat 10-12 minutes, stirring occasionally, until onions are lightly browned. Add garlic and cook 1 minute more. Add Cognac if using, STAND BACK, and ignite with a match to burn off alcohol. Return meats to pan, along with juices from the plate. Add wine and enough broth to almost cover the meat. Add tomato paste and thyme, if not already added. Bring to a boil and either cover with lid and put in oven for about 75 minutes, or simmer over low heat for 75-90 minutes with cover just slightly askance. Meat and vegetables should be very tender when pierced with a fork.
4. Place the stew on the stove top, if not already there. Combine 2 TBSP butter and the flour with a fork and stir into the stew. Add frozen onions, if using. 
5. In a medium pan, saute the mushrooms, if using, in the remaining 2 TBSP butter over medium heat for 10 minutes, or until lightly browned, and then add to the stew. 
6. Bring the entire stew to a boil, then lower the heat and simmer, uncovered, for 15 minutes. Season to taste. 
Serve with sliced country bread rubbed with garlic, or mashed potatoes, or egg noodles.


Tuesday, November 1, 2011

#Occu-Pie


 "Occupy! Occupy! What kind of pie? Occupy!" 

 This catchy little chant has been stuck in my head for days. A man at a non-Occupy protest I attended last week kept shouting it during lulls in the action. As I listened, I was food-inspired. Though I wondered, What's in Occu-pie, anyway? 

Apples, of course. Apple pie is quintessentially American. So is the right to assemble, peacefully, and voice one's discontent with the status quo. I used three kinds of apples: Jonathan, Braeburn, and Granny Smith. Sort of like the apple version of a melting pot. 

But regular old apple pie wasn't enough to qualify as Occu-pie. It needed something more. Something slightly out of the ordinary, but not all hippie-like and beyond the mainstream. Maybe something with a little kick to it. 

Bourbon. For liquid courage (symbolic, of course, since the alcohol burns off) in the face of police throwing flash-bang grenades and tear gas, and maybe a little warmth on cold nights in tents. Having a non-existent hard liquor cabinet myself, I borrowed a few tablespoons from my neighbor. Who then borrowed some white wine I'd just opened for a recipe she was making. This sort-of-barter system suits us just fine, helping us ensure we use up what we have, saving us a few fossil-fuel-powered trips to the store, and creating a little mini-community of food and ideas that is the antidote to the Every Man for Himself attitude that fuels the Occupation.

Even though I made 25% more crust dough than I did for my Bolinas Blackberry Pie, I still didn't have enough to make a full lattice. So I threw flour, unmeasured, and butter at the wrong temperature into the food processor to make more. I chilled the dough, which I realized later was missing sugar, for one-fourth of the time I should have, and got a very pretty lattice that tasted like Play-Doh. This hasty fix for my pie was a gentle reminder that, like dough, change happens slowly.


While statements from protesters such as, "I have a Master's degree and I can't find a job" or "Big Banks foreclosed on my home" allow individuals to connect to the larger movement, #Occupy Wall Street isn't about getting those people's houses or jobs back. At least, not directly. It's really about changing a system that is totally out of balance, and is totally unsustainable. This MoveOn video, featuring Elizabeth Warren, sums it up nicely.    


Wednesday, October 26, 2011

Stuffed

I was a deprived child: My parents made me eat green leafy vegetables, low-sugar cereals, and worst of all, bread made with twigs and berries.

My dear departed grandmother fixed me sandwiches on white bread with iceberg lettuce. My aunt gave me Honey Smacks cereal for breakfast, which had at least a day's worth of sugar per serving. But they both lived on the East Coast, and we only traveled there a few times during my childhood, so my malnourishment, practically, dragged on for years between visits.

     All this depravity made me love Thanksgiving, and not just for the almost-burned marshmallows (read: sugar) on top of the sweet potatoes. See, my mother bought white bread once a year: the week of Thanksgiving. She used it to make the stuffing that was fought over in our house, and she would leave it out overnight, uncovered, to let it get a little stale before tearing it into pieces for the stuffing. There were always fewer pieces of bread on Thanksgiving morning than there were the night before, since I would steal a piece or three and either eat it plain, or make The Quintessential Peanut Butter and Jelly Sandwich. Or both. Except of course we didn't have Quintessential American Peanut Butter in the house, since it is filled with sugar and stabilizers, so I had to make do with Earthy Crunchy All-Natural With Oil That Rises to the Top and Stains Your Shirt When You Stir It Peanut Butter.

Pumpkins are appearing everywhere, November issues of magazines are out with their plethora of ideas for Thanksgiving, and I made a pumpkin pie the other day, so I was inspired to do a little trial run this month in preparation for next month. Plus, I had some chestnuts waiting to be used and happened to come across a recipe for stuffing that included chestnuts, so clearly the stuffing stars were aligned. The recipe was actually for cornbread stuffing, but all I had was blue cornmeal, which creates a grayish batter (and bread). And truth be told, it was probably past its prime, so I decided to use white bread instead. I purchased the loaf in the late afternoon, and naturally was hungry as I drove around town running a few more errands, so the loaf was noticeably smaller by the time I got home. However, I have learned through careful study over the years just how many pieces I can inhale while still leaving enough for the stuffing, so all was not lost.

My mother's stuffing was a slightly odd mix of influences, yet worked somehow: onions and celery (but no carrots, so not a true mirepoix), sauteed mushrooms, lots of butter and broth, parsley, and water chestnuts. Yes, water chestnuts. They added a bit of crunch, but not a jolt, which my mother deemed necessary to balance the mush that the white bread turned into. I've recreated her stuffing before, and liked it, but I wanted to try something a little different. But not as different as, say, persimmon stuffing, which I've also tried before and didn't like. At all.

The recipe I was halfheartedly following called for mirepoix, plus apples and chestnuts, along with a little parsley and the butter and broth I was used to. The chestnuts were a pain to prepare, since the inner skins didn't come off easily, and they were a bit chalky in the cooked stuffing, so I either didn't pre-cook them well enough or they had been sitting in the produce section for too long. Next time I will try jarred chestnuts, since their flavor is lovely. I really liked the apple bits, and the carrots gave color and texture to the stuffing, so those may make an appearance next month as well. And of course, my beloved white bread anchored the whole thing so nicely, just as I knew it would.

The cardinal rule of stuffing seems to be Add Whatever Floats Your Boat, be it water chestnuts or corn bread or sausage or mushrooms. Or persimmons. Which I love, but not in stuffing. While I don't know the exact evolution of stuffing, I would guess that on the first Thanksgiving or two, there were some ingredients that needed to get used up, and so creating an absorbent edible layer inside the bird that caught all those fatty yet flavorful juices was just perfect. Just like my mom's stuffing. And mine. And yours.

Technically, this is dressing, not stuffing, but I just can't bring myself to put it inside a raw bird. Salmonella and I are not friends.


A trial run just isn't a trial run without cranberry sauce. Or marshmallows.


NB: Fortunately I have about 5 pieces of white bread left over, which are waiting in the freezer for the perfect occasion to be eaten.  Such as after I eat the green leafy vegetables in my fridge. Or a bowl of low-sugar granola. Or a sandwich with Twig-and-Berry Bread. With natural peanut butter, of course.

Friday, October 21, 2011

Cyber-friendship Cookies

Recently, I joined foodbuzz.com, which is a bit like Facebook for food bloggers. The difference, though, is that I don't actually know any of my "friends"-- I didn't go to kindergarten with them, I didn't secretly have a crush on any of them in high school, and I don't cut their paychecks, so they are not obligated to befriend me. Yet nearly 50 total strangers welcomed me to the Foodbuzz world within 2 or 3 days, and have left little bundles of encouragement all over.


I've been in a female-dominated profession for the last decade. While I have met and befriended some fantastic and supportive women, I have also witnessed some catty behavior-- you know, that whole lobsters-in-a-tank mentality-- and so I appreciate the genuine interest, feedback, and willingness to share that has come my way in a genre of blogging that also seems to be dominated by women.

Feeling all warm and fuzzy inside (a not-so-common occurrence for me; just ask my face-to-face friends), I googled "friendship cookies," thinking I'd heard of such a thing, and thinking they seemed the perfect cookies to make now. My search results, though, were ambiguous at best, and it seems that any cookie can be a friendship cookie, so long as it is baked for a friend. Or 50.

I knew Dorie Greenspan wouldn't let me down, especially at a moment like this. I needed something that was relatively easy, not sickeningly sweet, and pretty**, since ugly friendship cookies just don't send the right message.  Oh, and I needed to use the 4 ounces of cream cheese I had on hand. Greenspan suggested rugelach. OK, not really, but the photo looked delicious and the dough calls for cream cheese, so it's sort of the same thing.

** I reread the recipe as I was writing this and realized I missed the step that told me to refrigerate the cookies for 30 minutes before baking. This probably explains why mine look like pigs in blankets. However, if you actually follow directions, you will probably get more shapely rugelach.

As with many of her cookie recipes, Greenspan says you can halve the dough and freeze it for those I Just Made A New Friend moments. I kept the second half of the dough in the fridge for a few days simply because I didn't have time to make all of them at once. Either way, they work well. I gave a few away to a live friend, who reported that they were so good that she was still thinking about them the following morning. I guess that means we'll be friends for a while.

Greenspan also notes that rugelach invite experimentation, and I agree. This recipe calls for jam, nuts, currants, chocolate, and cinnamon sugar in the filling. I used almonds, raisins, dark chocolate, and raspberry-apricot jam. I omitted the cinnamon sugar in the second half, because while the first ones were very good, they were on the verge of being too sweet. I doubt the original rugelach, made by Ashkenazi Jews, contained dark chocolate or jam, but if your new friends like chocolate, use it, by all means.


Foodie Friends Rugelach
from Baking: From my home to yours by Dorie Greenspan
*Greenspan says this recipe makes 32 cookies. I got about 24, but if you chop your ingredients finely and cut your triangles smaller, you can eek out 32.

For the dough
4 oz cream cheese, cold
1 stick (8 TBSP) cold, unsalted butter
1 C all-purpose flour
1/4 tsp salt

For the filling
2/3 C raspberry or apricot jam, heated over low heat until liquified
2 TBSP granulated sugar (I omitted this)
1/2 tsp ground cinnamon
1/4 C chopped nuts
1/4 chopped raisins (or currants)
4 oz dark chocolate, finely chopped (I used about 2 oz)

For the glaze
1 egg
1 tsp cold water
1-2 TBSP sugar


1. Let cream cheese and butter rest on counter for 10 minutes, so they are slightly softened but still cool. Cut into chunks.
2. Put cream cheese, butter, flour, and salt in food processor. Pulse machine 6-10 times, and then process until the dough forms large curds but does NOT form a ball on the blade.
3. Turn dough out onto work surface, form into a ball, and divide in half. Shape halves into disks and wrap each in plastic wrap. Refrigerate dough for at least two hours, or freeze for up to 2 months.
4. Working with one disk at a time, roll the dough out on a lightly floured surface into an 11-12" circle. Brush a thin layer of jam over dough, and sprinkle with half the cinnamon sugar, if using. Scatter half the nuts, raisins, and chocolate over the jam. 
5. Cut the circle into 16 wedges (cut into fourths first, then cut each fourth into fourths again).  Starting at the base of each wedge, roll up the dough into little crescents. Place on baking sheet coated with cooking spray or parchment paper, pointed end down. Refrigerate cookies for 30 minutes before baking. You can also freeze unbaked cookies at this point for up to 2 months. Don't defrost before baking. Just add a couple of minutes to your baking time.
6. Preheat oven to 350 degrees. 
7. Stir together water and egg. Brush a bit of the egg wash over the tops of the cookies and sprinkle a bit of sugar on top. Bake for 20-25 minutes until they are puffed and golden. Cool on wire racks.

Tuesday, October 11, 2011

Loving This #1

Here's what I'm eating too much of:

That's right. Dark chocolate outside. Silky-smooth caramel inside. Black sea salt on bottom. Utter perfection all around. It's from Trader Joe's. It's $1.99. I know.


Clearly, I'm loving this whole salted caramel craze. I haven't perfected my own yet, so until I do, this makes a fine substitute. A very fine substitute, indeed.


p.s. I'd never heard of black sea salt either. That's because it's over $5 a pound.
http://www.saltworks.us/shop/product.asp?idProduct=391

Saturday, October 8, 2011

Pumpkin Spice Muffins

 There's no  pumpkin in these muffins.

I bought an enormous butternut squash for another recipe, and quickly realized I had way too much. I considered making a pie, since it is officially time for the orange flesh + cinnamon + cloves + nutmeg combination. But pies are big. I wanted something smaller. And butternut squash could easily stand in for pumpkin in these fabulous little muffins.

Since I had already baked the squash, I threw the unused portion into the food processor to purée it. This makes better-than-canned pumpkin. Or baby food. Whatever. The purée was sweeter than canned pumpkin, so I reduced the sugar in the recipe by about an eighth of a cup. I also used hazelnuts instead of pecans or walnuts, because that's what I had. I toasted them in the oven before I added them to the batter, because that's how I like them.

The recipe calls for unsalted raw sunflower seeds to be sprinkled on top of the muffins just before baking. Clearly, this would make them all earthy-crunchy-granola. These are listed in the "Breakfast Sweets" section of Dorie Greenspan's Baking, and while breakfast + sweets = oxymoron, there's no point trying to healthify things now. Face it, Greenspan: a few sunflower seeds will not neutralize an entire stick of butter for breakfast.

Muffins are best eaten the day they are made.  This disclaimer appears next to each muffin recipe in Baking, and in the directions of many other muffin recipes I've encountered. It's true, of course, but here's my alternate interpretation:  Find something moist and delicious to spread on the muffins on Days 2 and 3.  Butter is not an option, since cold butter spread on room temperature muffins creates Crumbs. Something spreadable would be perfect. Like cream cheese.

Starbucks has these pumpkin-cream cheese muffins with the glob of cream cheese built into the center of the muffin before baking. Mine were already baked, but I thought a little cream cheese icing would be perfect. Maybe with a little lemon juice to create a tart-sweet effect. I beat together some cream cheese, a few tablespoons of butter, a little powdered sugar, and some lemon juice and got the perfect spread. But my spreading attempts were not pretty. 


I remembered I had some piping tools in a drawer that I never use, so I gave the vintage one of my mother's a try. I wasn't sure about putting anything with acid in a metal container, but since the Icing Debacle lasted only a few minutes, I did it anyway. So far, I haven't died. And my icing is not Metal Flavored. 

My decorating skills, however, leave a lot to be desired. This is probably why the tools have stayed untouched in that drawer for ages. Yeah, I know-- chicken or egg. Anyway. The fancy star attachment did not magically create starry designs on my muffins. I thought it might be because my muffins have pointy tops, so I tried cutting off a muffin top and putting the icing on the now-flat surface. But, as everyone who watches Seinfeld knows, the muffin tops are the best part. So I put it back on. Somehow, I don't think that's what Elaine meant.


Many thanks to Kahori of Chuzai Living for telling me about Picasa and its nifty collage feature. Plus, I went to see the Picasso exhibit at the de Young museum last weekend. That guy had some issues. But he also had that whole collage thing down pat.


Pumpkin Spice Muffins
adapted from Baking: From my home to yours by Dorie Greenspan
makes 12 muffins

2 C all-purpose flour
2 tsp baking powder
1/4 tsp baking soda
1/4 tsp salt
3/4 tsp ground cinnamon
1/2 tsp ground ginger
1/8 tsp grated nutmeg (I used just a pinch)
a pinch of ground allspice (I used 1/4 tsp)
1 stick (8 TBSP) butter, at room temperature
1/2 C granulated sugar
1/4 C packed brown sugar 
2 eggs
1/2 tsp vanilla extract
3/4 C canned unsweetened pumpkin 
1/4 C buttermilk (I used 2% milk with about a teaspoon of lemon juice mixed in; let stand for 10 mins) 
1/2 C raisins
1/2 C chopped pecans, walnuts, or hazelnuts (try them toasted first!) 

1. Preheat oven to 400 degrees. Spray 12-cup muffin pan with cooking spray. If you use paper cups, spray the insides so they release the muffins instead of tearing off half your muffin.
2. In a medium bowl, mix together the flour, baking soda, baking powder, salt, and spices. Set aside.
3. Beat the butter at medium speed until soft. Add sugars and beat until light and smooth. Add eggs, one at a time, and then vanilla. Mix in the pumpkin and buttermilk at low speed. 
3. Mix in the dry ingredients at low speed only until incorporated. 'Tis better to use a rubber spatula to mix in the last bits than to over-mix! Stir in the nuts and raisins with said rubber spatula.
4. Divide batter evenly among muffin cups. Bake for 22-25 minutes, or until a thin knife inserted into the center comes out clean. 
5. Cool muffins in the tin on a wire rack for 5 minutes. Remove muffins from tin and cool completely on rack. 

* For the icing, I used Greenspan's recipe for cream cheese icing for a carrot cake. It calls for a stick of butter, 8 oz of cream cheese, a pound of powdered sugar, and a tablespoon of lemon juice. I made a much smaller quantity, of course, but tried to keep the proportions in the same ballpark, except for the lemon juice, which I used lots of. Because that's how I like it.